How to Set Up and Manage Your District
Set up your District to organize spaces, manage members, and publish under one branded subdomain
What is a District?
A District is a branded subdomain under the Metasteps domain (for example, yourbrand.metasteps.com) that serves as a central hub for organizing and managing multiple 3D spaces.
Within a District, owners can:
- Host both published and draft spaces
- Apply shared branding and visibility settings
- Manage member access and roles
- Use a shared Content Library across all District spaces
Districts can be public or private, depending on access requirements:
- Public Districts are accessible to anyone
- Private Districts restrict access to invited members only
This structure supports use cases such as education programs, exhibitions, internal projects, training environments, and institutional or organizational workflows.
2. What do Districts offer?
Districts provide a set of tools for branding, space management, member access, and publishing multiple spaces under a single subdomain. The sections below outline the main capabilities available to District owners.
2.1 Brand Customization Options
A District can be customized to reflect an organization’s or project’s visual identity. Branding settings are applied at the District level and define how all spaces appear under the District subdomain.
Available customization options include:
- Custom subdomain: A dedicated URL under the Metasteps domain (for example, yourbrand.metasteps.com)
- Logo and banner: Upload a logo and header image for the District
- Theme settings: Configure fonts, color schemes, and button styles
These settings help maintain a consistent visual identity across all spaces hosted within the District.
2.2 3D Editor in a District
Each District uses the same 3D Editor available to all Metasteps users, but it must be accessed through the District subdomain, where additional District-level capabilities and benefits are available.
For Business Users, each District includes 20 spaces, unlimited access to premade spaces and built-in assets, 50 GB of shared Content Library storage, communication and privacy controls, branding options, and dedicated support.
2.3 Member Management Control
District owners control access to the District by inviting members and assigning roles.
Available roles include:
Creators: Users assigned to specific publishing slots. Creators can edit, save, and publish the spaces allocated to them through the slot system.
Guests: Users granted viewing access to selected spaces or to all spaces within the District.
Each space is managed by a single assigned creator. Multiple users cannot edit the same space simultaneously.
District owners can modify roles at any time.
2.4 Public and Private access
Districts can be configured as public or private, depending on access requirements.
Public Districts
Public Districts are accessible to all visitors. Editing and publishing permissions remain restricted to authorized members. Individual spaces within a public District can still include additional access restrictions if needed.
Private Districts
Private Districts require invitations for access. Only invited members can view or interact with the spaces, ensuring controlled access for internal or restricted projects.
3. Getting Started with a District
3.1 Creating a District
To create a District, an active Business or Academic Plan is required. Once your plan is active, go to your profile page by clicking on your user icon at the top right of the header and selecting your name.
From there navigate to Districts → My District → Set Up District.
Choose a District name, subdomain, and access control
Enter a District name and select a unique subdomain under the Metasteps domain (for example: mybrand.metasteps.com). Then choose whether the District will be public or private. This setting can be changed later; however, while the District name can be updated at any time, the subdomain prefix cannot be modified after creation.
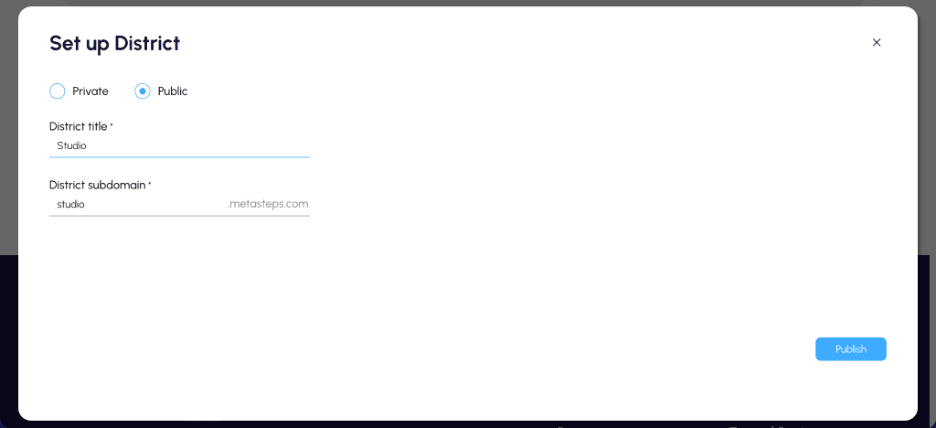
District setup
3.2 Personalizing your District
After creating your District, you can customize its appearance and settings.
Upload a logo and banner image
Add a logo and a banner image to visually identify your District.
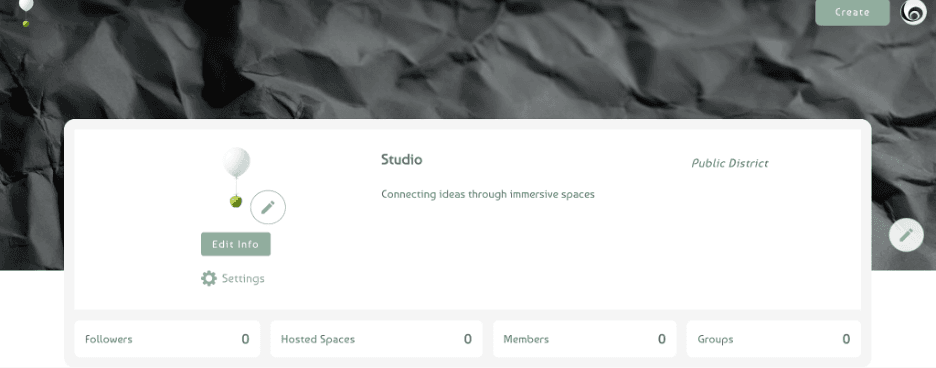
Add your logo and a banner image
Edit District information
Click Edit Info to add or update the District tagline, description, and social media links.
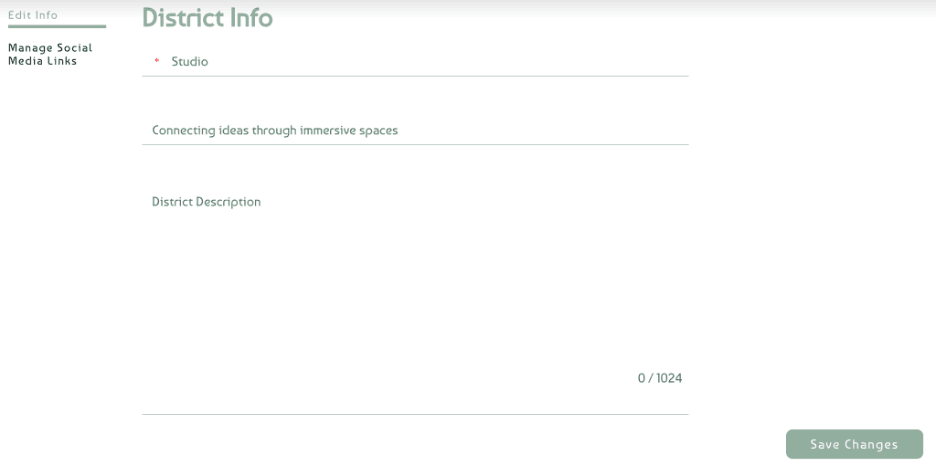
Editing District information and description
3.3 District Settings
Click Settings to open the District configuration panel. From here, you can manage the District’s visibility and appearance.
In the General section, you can:
- Set the District as public or private
- Hide the District from the Explore page
- Control whether the District appears as listed or unlisted
- View the assigned District subdomain (cannot be modified after creation)
In the Appearance section, you can:
- Select the font family
- Customize theme and text colors
- Adjust button style
- Modify logo display size
Changes are applied after selecting Save.
3.4 Managing District Members
You can invite and manage members from the Members section of your District.
Invite Members
To invite new members:
- Open the Members tab.
- Click Invite under Members & Invitations.
- Enter the user’s email address or Metasteps username (if already registered).
Invited users receive a confirmation email. If they do not already have a Metasteps account, they will be prompted to register before accepting the invitation.
3.5 Assigning Roles
After accepting the invitation, users appear under the All Members tab.
To assign or change a member’s role:
- Click Manage next to a member’s name.
- Select the appropriate role.
Available roles include:
Guest (default): Can view and visit spaces only
Creator: Can create, edit, and publish 3D spaces within the District
3.6 Creating Spaces in a District
Always create new spaces directly from within the District environment.
To do this, first open your District subdomain and click + Space from the Spaces tab inside the District.
Do not create spaces from your personal account’s Spaces page, as those spaces will belong to your personal account and will not automatically appear in the District.
Creating spaces from within the District ensures that:
- the space is correctly associated with the District subdomain,
- publishing and access permissions are applied properly,
- and the space can be managed through District slots and member roles.
3.7 Additional Access Control per Space
District privacy settings control who can access the District as a whole. However, access permissions can also be configured individually for each 3D space.
Even within a public District, creators may restrict access to specific users, allowing only selected visitors to enter a space. Likewise, in private Districts, creators can further limit access to selected guests when more granular control is required.
Space-level permissions are configured during the publishing process.
4. Next Steps
After setting up your District, you can begin creating and publishing spaces, inviting Members, and organizing projects under your branded subdomain.
To learn how to publish spaces and configure access settings, continue with the Publish a 3D Space guide.