Add content & interactivity
Create an interactive and engaging immersive experience for your visitors by adding multimedia content (images, videos, 3D objects, 3D text), portals, info points and more.
Your 3D space isn’t just about design—it’s about crafting an immersive and interactive experience for your visitors. With multimedia content and interactivity, you can showcase your work, tell a story, and connect your audience to other virtual worlds. Let’s explore how to incorporate these elements into your 3D project for an enhanced user experience!
1. Add Multimedia objects
Multimedia is at the heart of interactive storytelling. Metasteps makes it simple to integrate a variety of content into your space. Whether it is images, videos, 3D objects or interactive text, here’s how to get started:
1.1 Upload Images
- Upload options: Click the "+" button to upload images directly from your computer or choose from your Content Library (if you have already uploaded content).
- Add metadata: Add a title to save it in your library; adding a description, tags, or audio is optional.
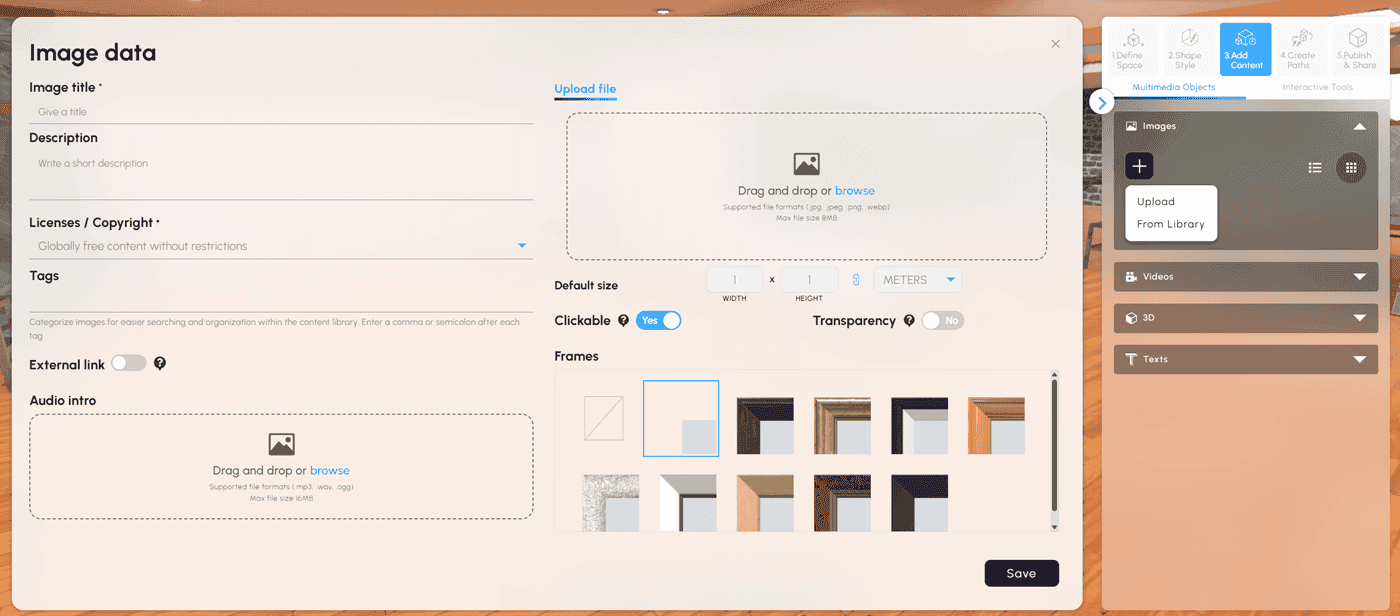
Upload your image files, add frames (optional) or audio intro
Advanced Options:
- Clickable image: Turn the image into an interactive element by adding information or audio.
- Appearance customization: Adjust the image's transparency, position or frame it for a more refined look.
- Collision settings: Choose whether visitors can walk through the image by enabling or disabling collisions.
1.2 Upload Videos
- Upload options: Click the "+" button to upload videos from your computer or choose from your content library. Alternatively, embed links from YouTube for greater flexibility.
- Add metadata: Provide a title, optional description, and license details for your videos.
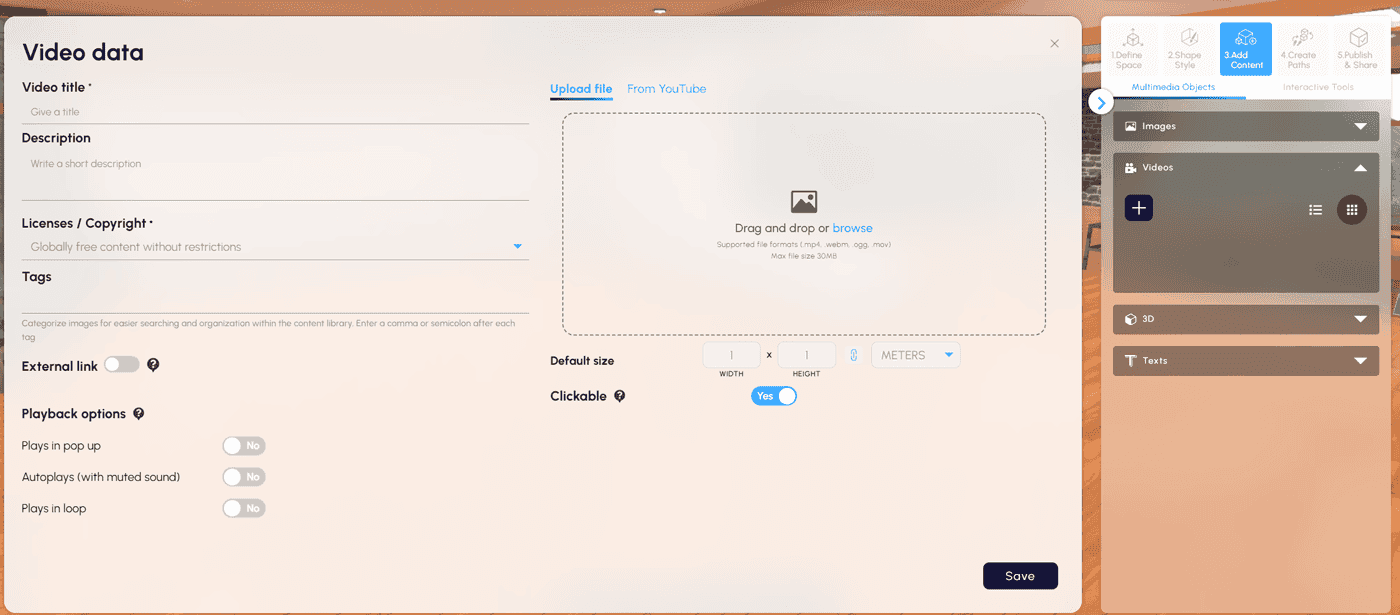
Upload video files or add links from YouTube
Advanced video settings:
- Make your videos clickable to link to additional resources or details for extra interaction.
- Adjust playback options (autoplay or manual start) for dynamic displays.
- Toggle collision to determine whether visitors can walk through the video or interact with it.
1.3 Live Streaming (YouTube)
To broadcast live, whether for lectures, seminars, workshops, or interactive onboarding sessions, simply generate a live stream link on YouTube and paste it into the YouTube tab in Metasteps. This allows you to stream live directly from your 3D space and engage with your audience in real time.
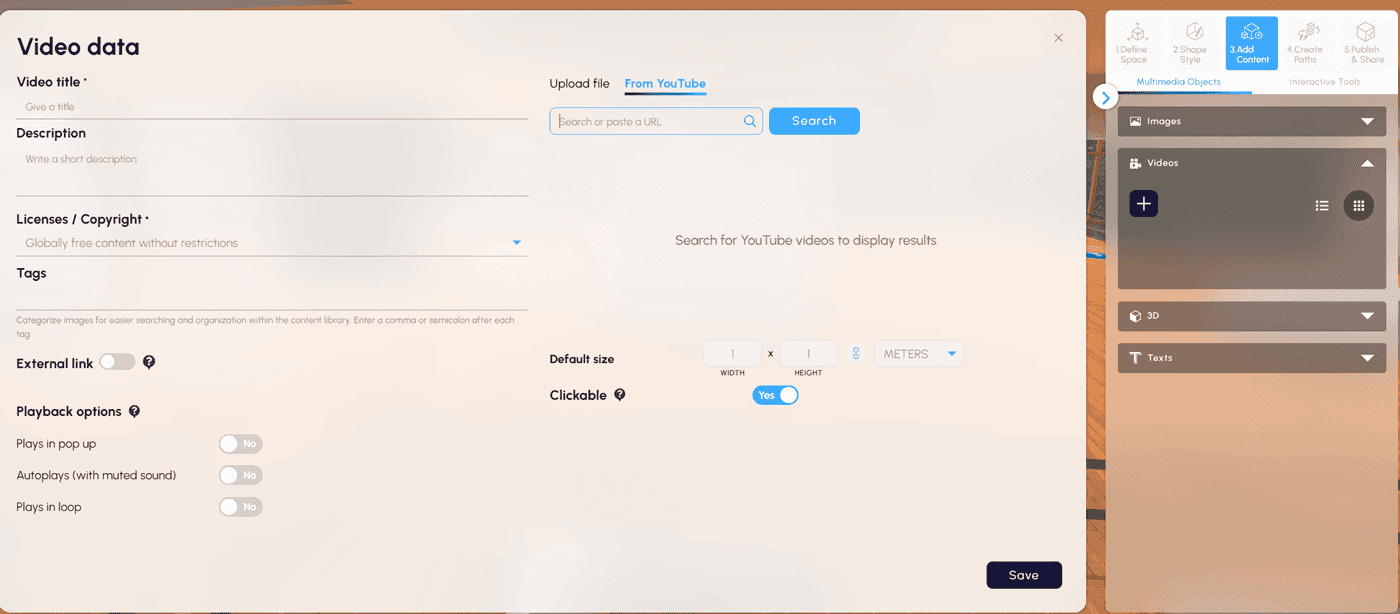
Live stream from your 3D space by adding the link in the YouTube tab
1.4 Add 3D Objects
- Upload options: Click the "+" button to upload 3D objects directly from your computer. Alternatively, leverage Sketchfab’s extensive library by searching with keywords to find the perfect fit for your project.
- Position, Rotate, and Scale: Fine-tune your objects by adjusting their placement, orientation, and size.
- Enable interactivity: Make objects clickable, allowing visitors to engage with them.
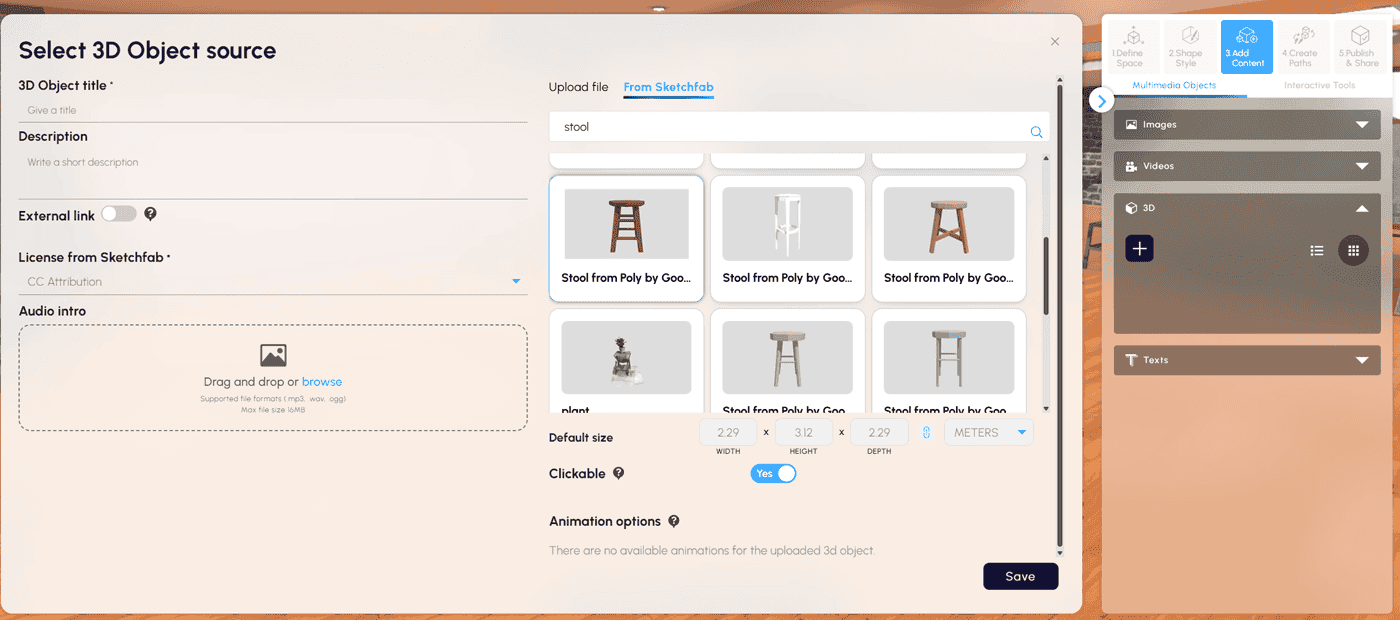
Upload directly 3D objects or select from Sketchfab
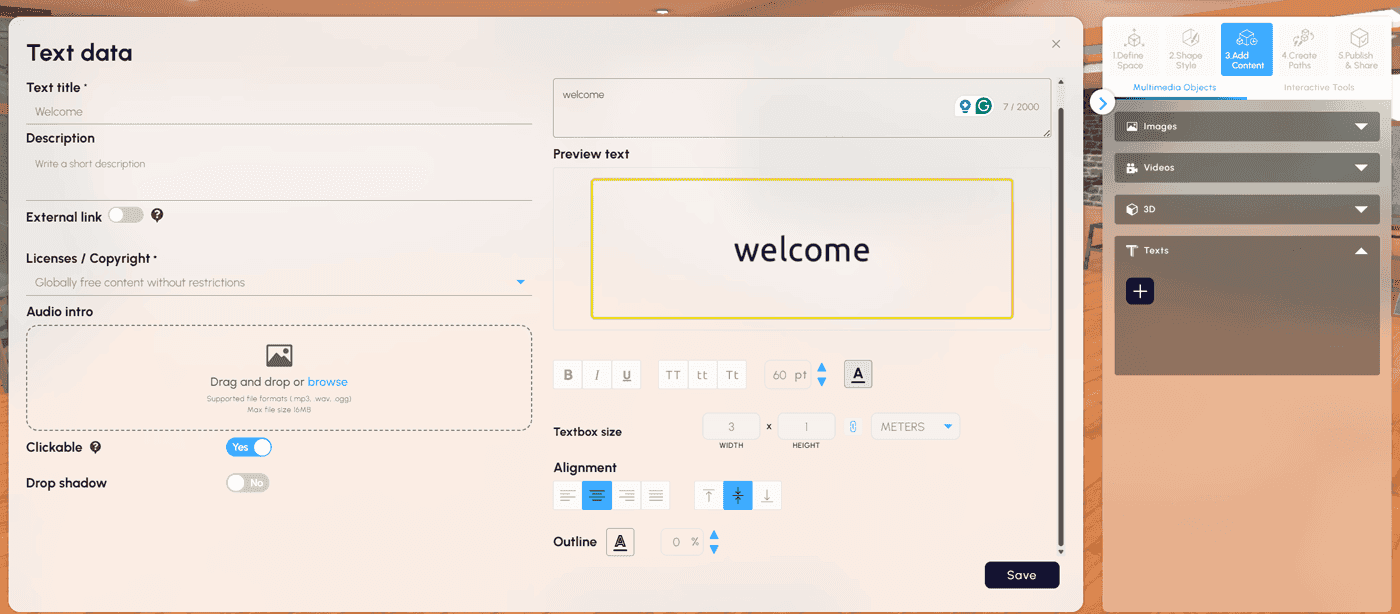
1.5 Create 3D Text
Transform plain text into stunning 3D visuals for labels, descriptions, or decorative elements in your space.
- Upload options: Click the + button to add your text
- Customize Style: Adjust the style, size, and color to match your space’s aesthetic.
- Adjust Placement: Position the text, resize and rotate it for dynamic angles.
Important Note: Opening the same space in more than one browser tab or window can cause synchronization conflicts and may result in lost progress. To ensure your work is saved correctly and avoid potential issues, always edit your space in a single tab or window at a time and remember to save your progress regularly.
2. Add Interactive Tools for Engagement
Enhance your 3D space by adding various interactive tools like Portals, info Points and more to enhance the engagement with your audience.
2.1 Portals
Portals provide an effortless way to connect your 3D space with other virtual environments, creating a continuous and engaging journey for your visitors. Portals offer exciting ways to expand and interconnect your space with:
- Your space portfolio: Link multiple projects within your portfolio, guiding visitors from one space to another and encouraging deeper engagement with your work.
- Public spaces: Direct visitors to public spaces on Metasteps, such as galleries, educational hubs, virtual storefronts, or training sessions, to highlight relevant projects.
- Public Districts: Broaden your audience’s journey and create opportunities for collaboration and interaction by linking your space to other 3D spaces within public Districts, either themed or community-driven, to build a networked virtual ecosystem.
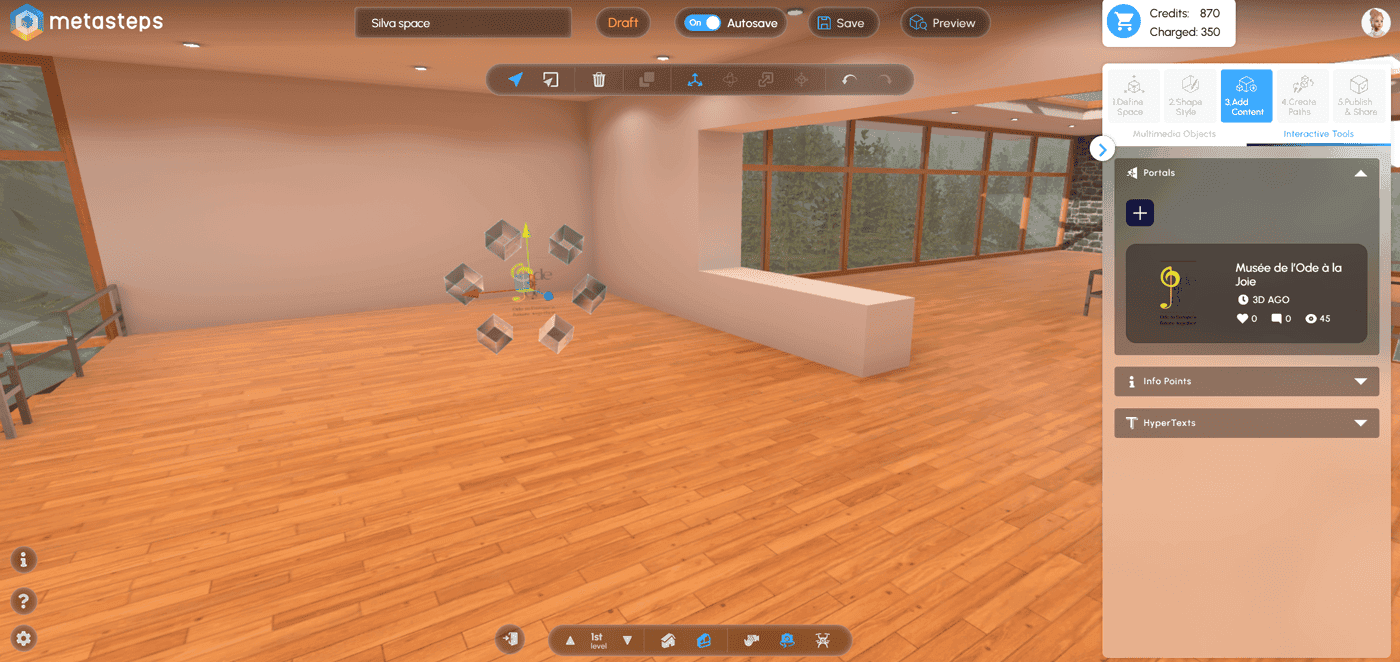
Portals enable visitors to teleport to other spaces
Setting up a portal is simple:
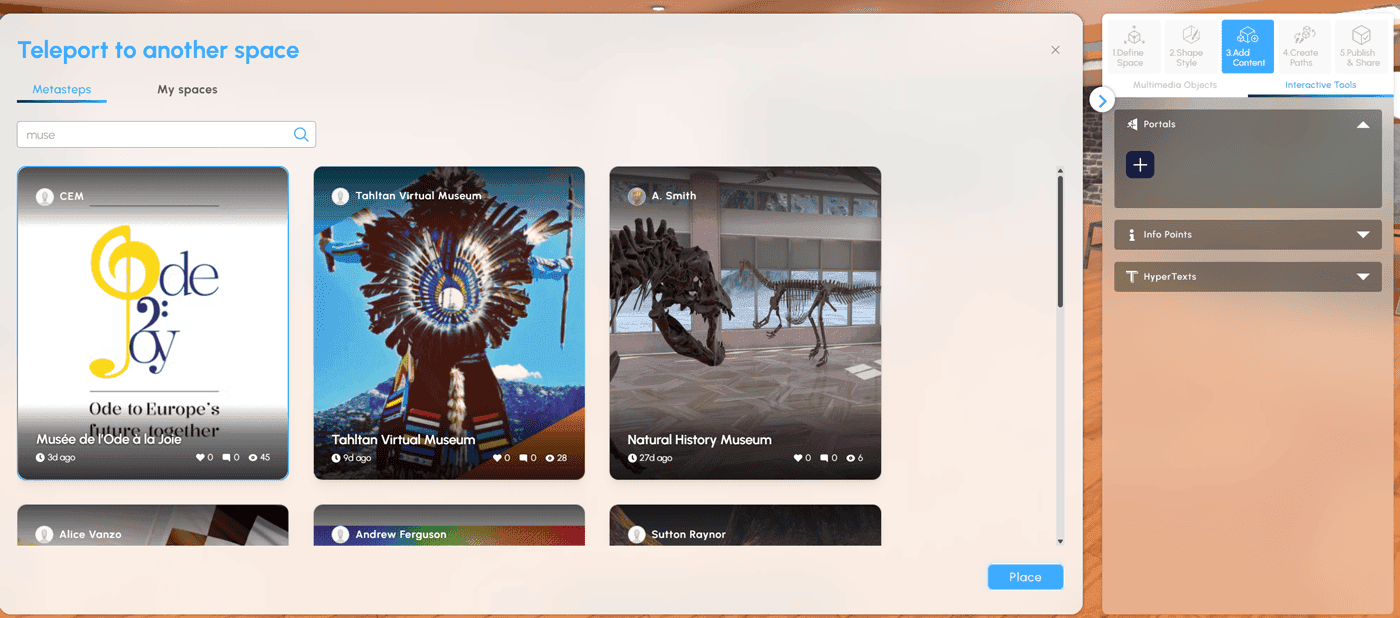
- Click the "+" button to place a portal in your space.
- Choose the space you want to connect to by searching within “My spaces” or by entering the name of the desired space on the “Metasteps” tab to establish the link.
- Once your space is published, visitors can walk through the portal, seamlessly transitioning to the linked space.
2.2 Info Points
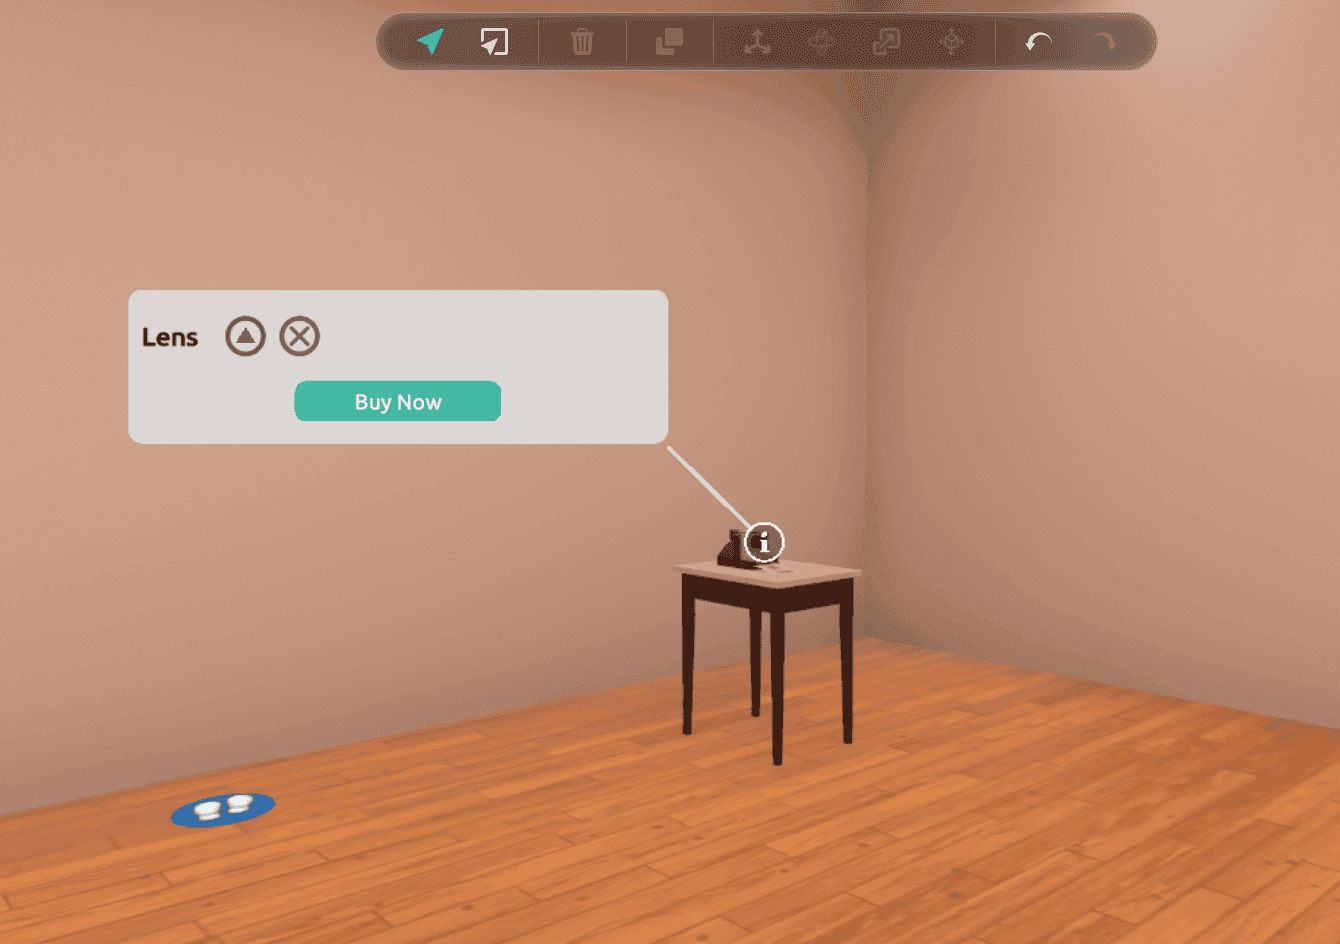
Highlight key elements of your digital assets with Info Points. Info Points allow you to explain product features, provide historical or artistic context, share bite-sized educational insights, and even link to external PDFs, videos, or websites for additional information.
- Click the + button to create a new Info Point.
- Add a title and a description to share specific details, facts, or context.
- You can also include external links to direct viewers to more resources.
- Add as many Info Points as you need—there’s no limit!
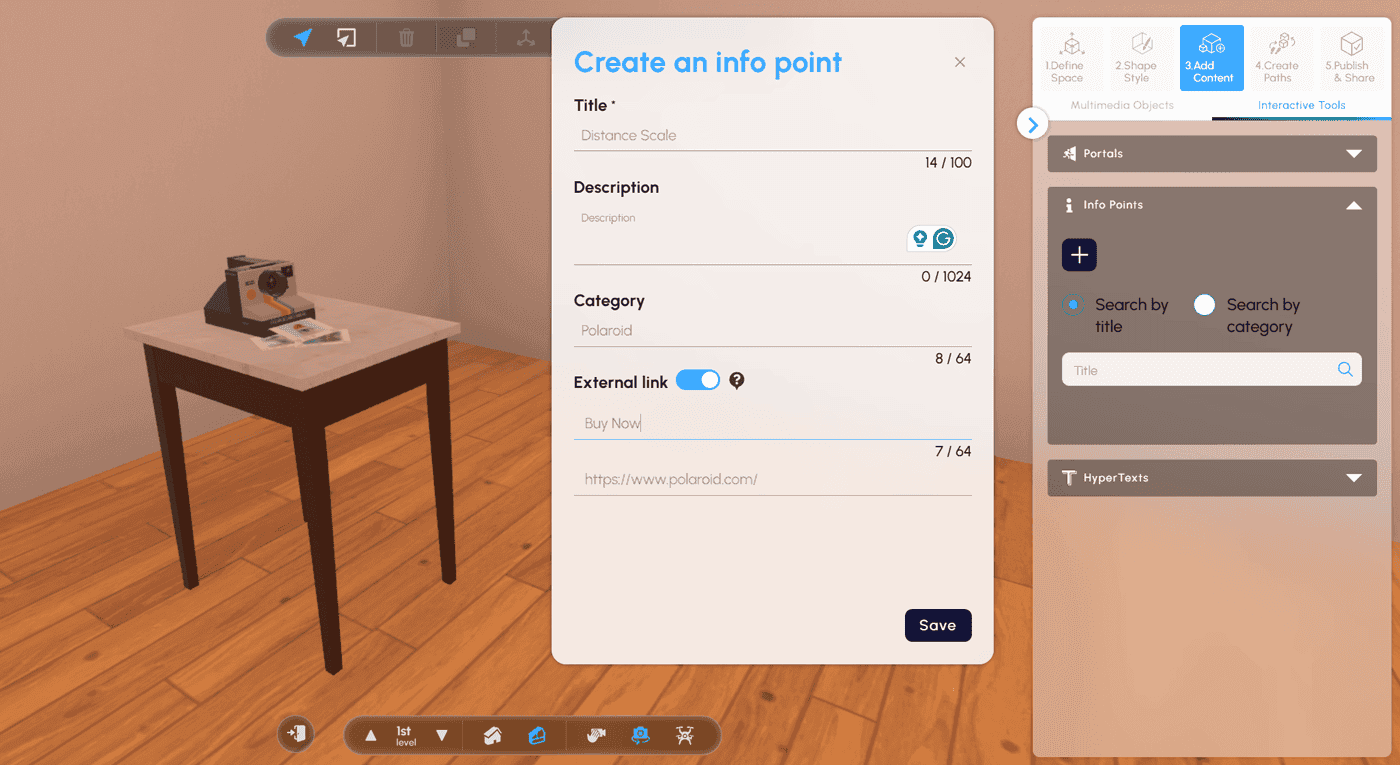
Add Info Points and organize them by category
Group your Info Points by adding custom categories, ideal for different product types or content themes. Categories work like folders, helping you stay organized and making your content easier to manage. You can quickly search Info Points by title or category for efficient editing and navigating.
2.3 Web Views
Metasteps’ Web Views feature lets you embed live web content tools, like forms, surveys, collaborative boards, presentations, and more, directly inside your 3D spaces. You can use Web Views to make spaces interactive for workshops, presentations, product demos, classrooms, galleries, or any experience where live collaboration matters. This opens up more possibilities for interaction and engagement in the virtual worlds.
- Click the + button to create a new WebView and add a title.
- Paste the external shareable link of the tool you want to embed.
- Place the Web View on any surface inside your space.
- Use the top toolbar to resize, expand, and move the WebView to ensure the content fits perfectly.
Any changes made inside a Webview are synchronized with the original tool. For example, if visitors add ideas to a shared board or edit a collaborative document, those updates will instantly appear in the original file, keeping everyone in sync.
Note: Web View availability may vary due to website security settings.
2.4 HyperText
Create hyperlinks within your space’s text elements to connect to additional content or external resources, perfect for adding depth to your stories or guiding users toward related information. Insert your text and external link on the left; your hyperlink will then appear in the Preview Text window on the right.
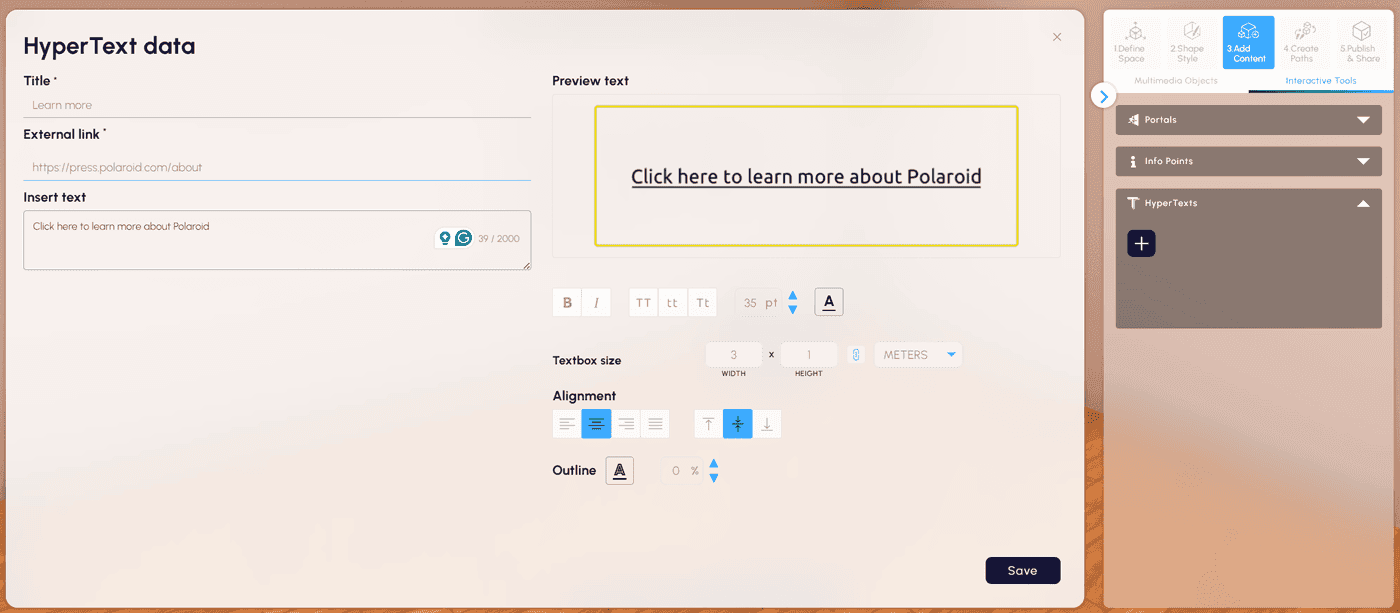
Insert text at the left and the external link and your hyperlink text will appear in the Preview text window.
Incorporating multimedia objects and interactivity into your 3D space enhances engagement, allowing you to share rich content, communicate your story, captivate visitors and transform your project into an unforgettable journey.
Ready for the Next Step?
With your content and interactive tools in place, you’re all set to move on to Step 4, crafting your guided paths. Keep creating, and let your imagination take the lead!