Connect Moodle to your district
Connect your Moodle account to Metasteps, browser your existing courses, and sync your content directly into your district library, ready for your team to drop straight into any 3D space.
Welcome! This guide walks you through connecting your Moodle instance to your Metasteps district, choosing which courses to make available in the library, and handing the synced content to your team. Let's dive in.
1. Connect your Moodle instance
Moodle is set up under Plugins & Integrations on your district page. Before you start, ask your Moodle admin for two things: a base URL for your Moodle instance and a 32-character API token. The Appendix at the end of this guide summarises everything they'll set up.
- Open Plugins & Integrations: From your district page, click Plugins & Integrations in the sidebar (alongside Edit info and Settings). The integrations panel slides in.
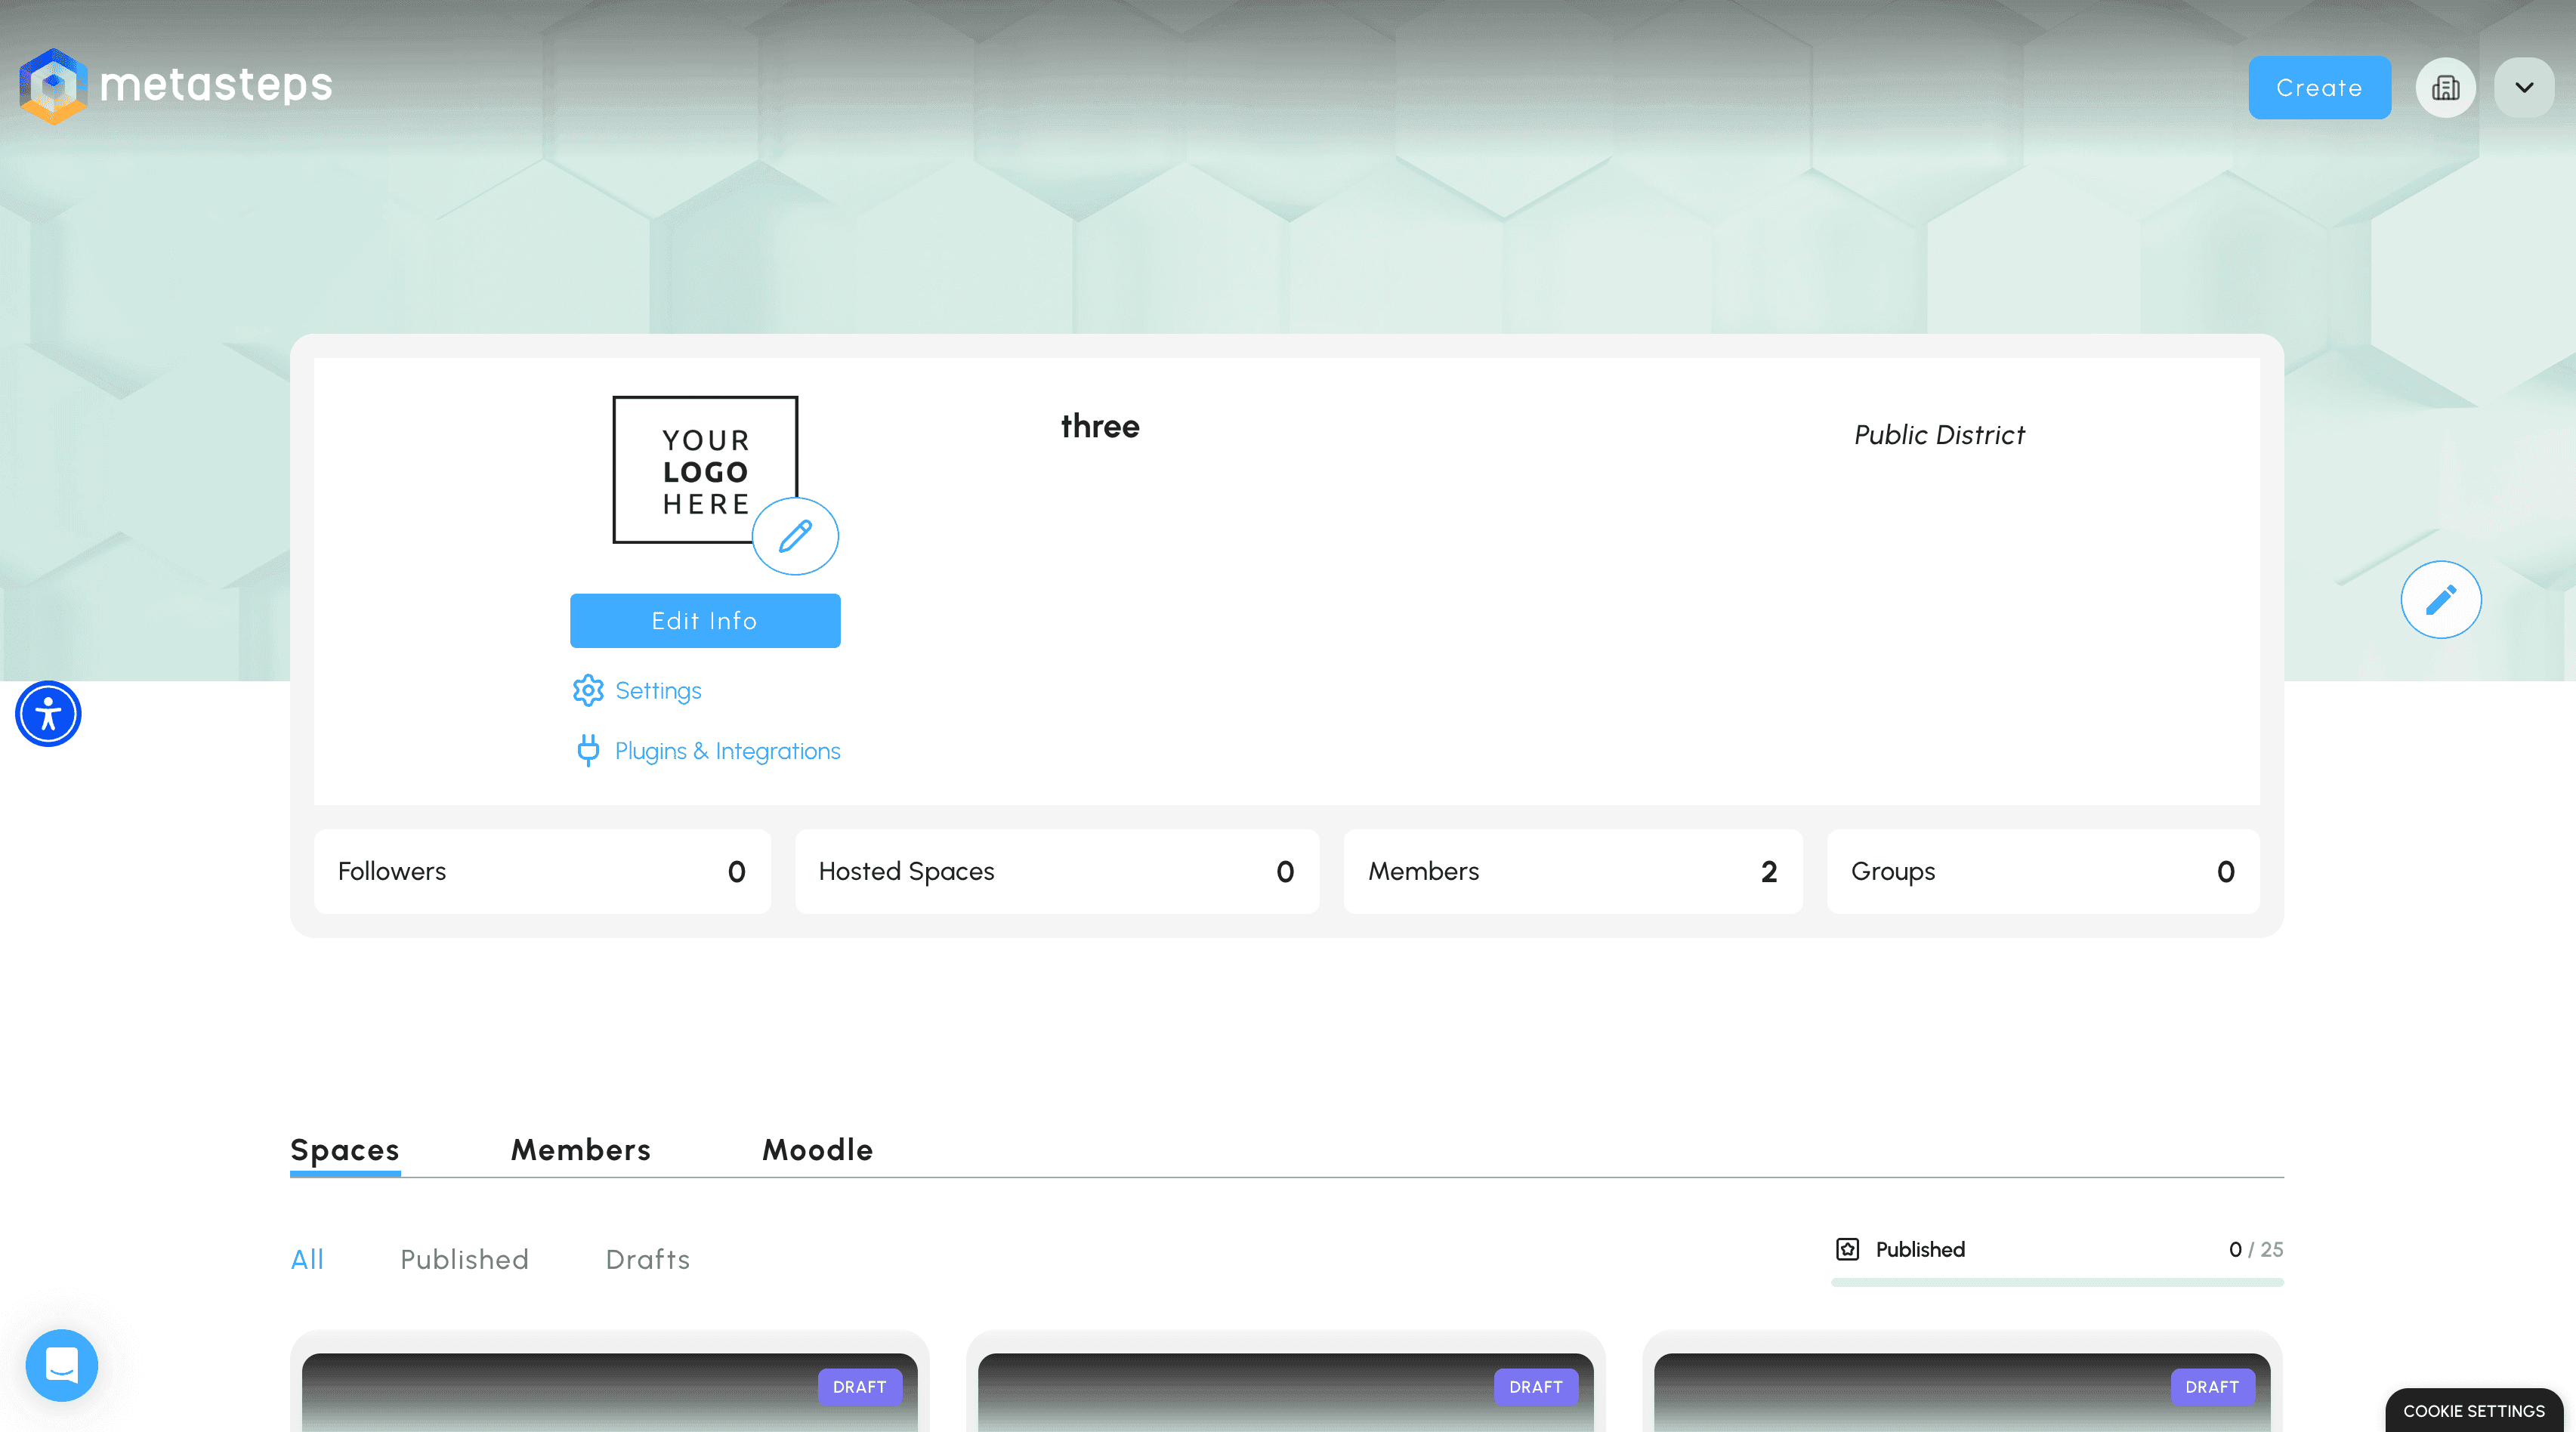
Plugins & Integrations sits in your district sidebar.
- Find the Moodle row: Today, the Moodle integration is listed as one row in the panel. Click Connect.
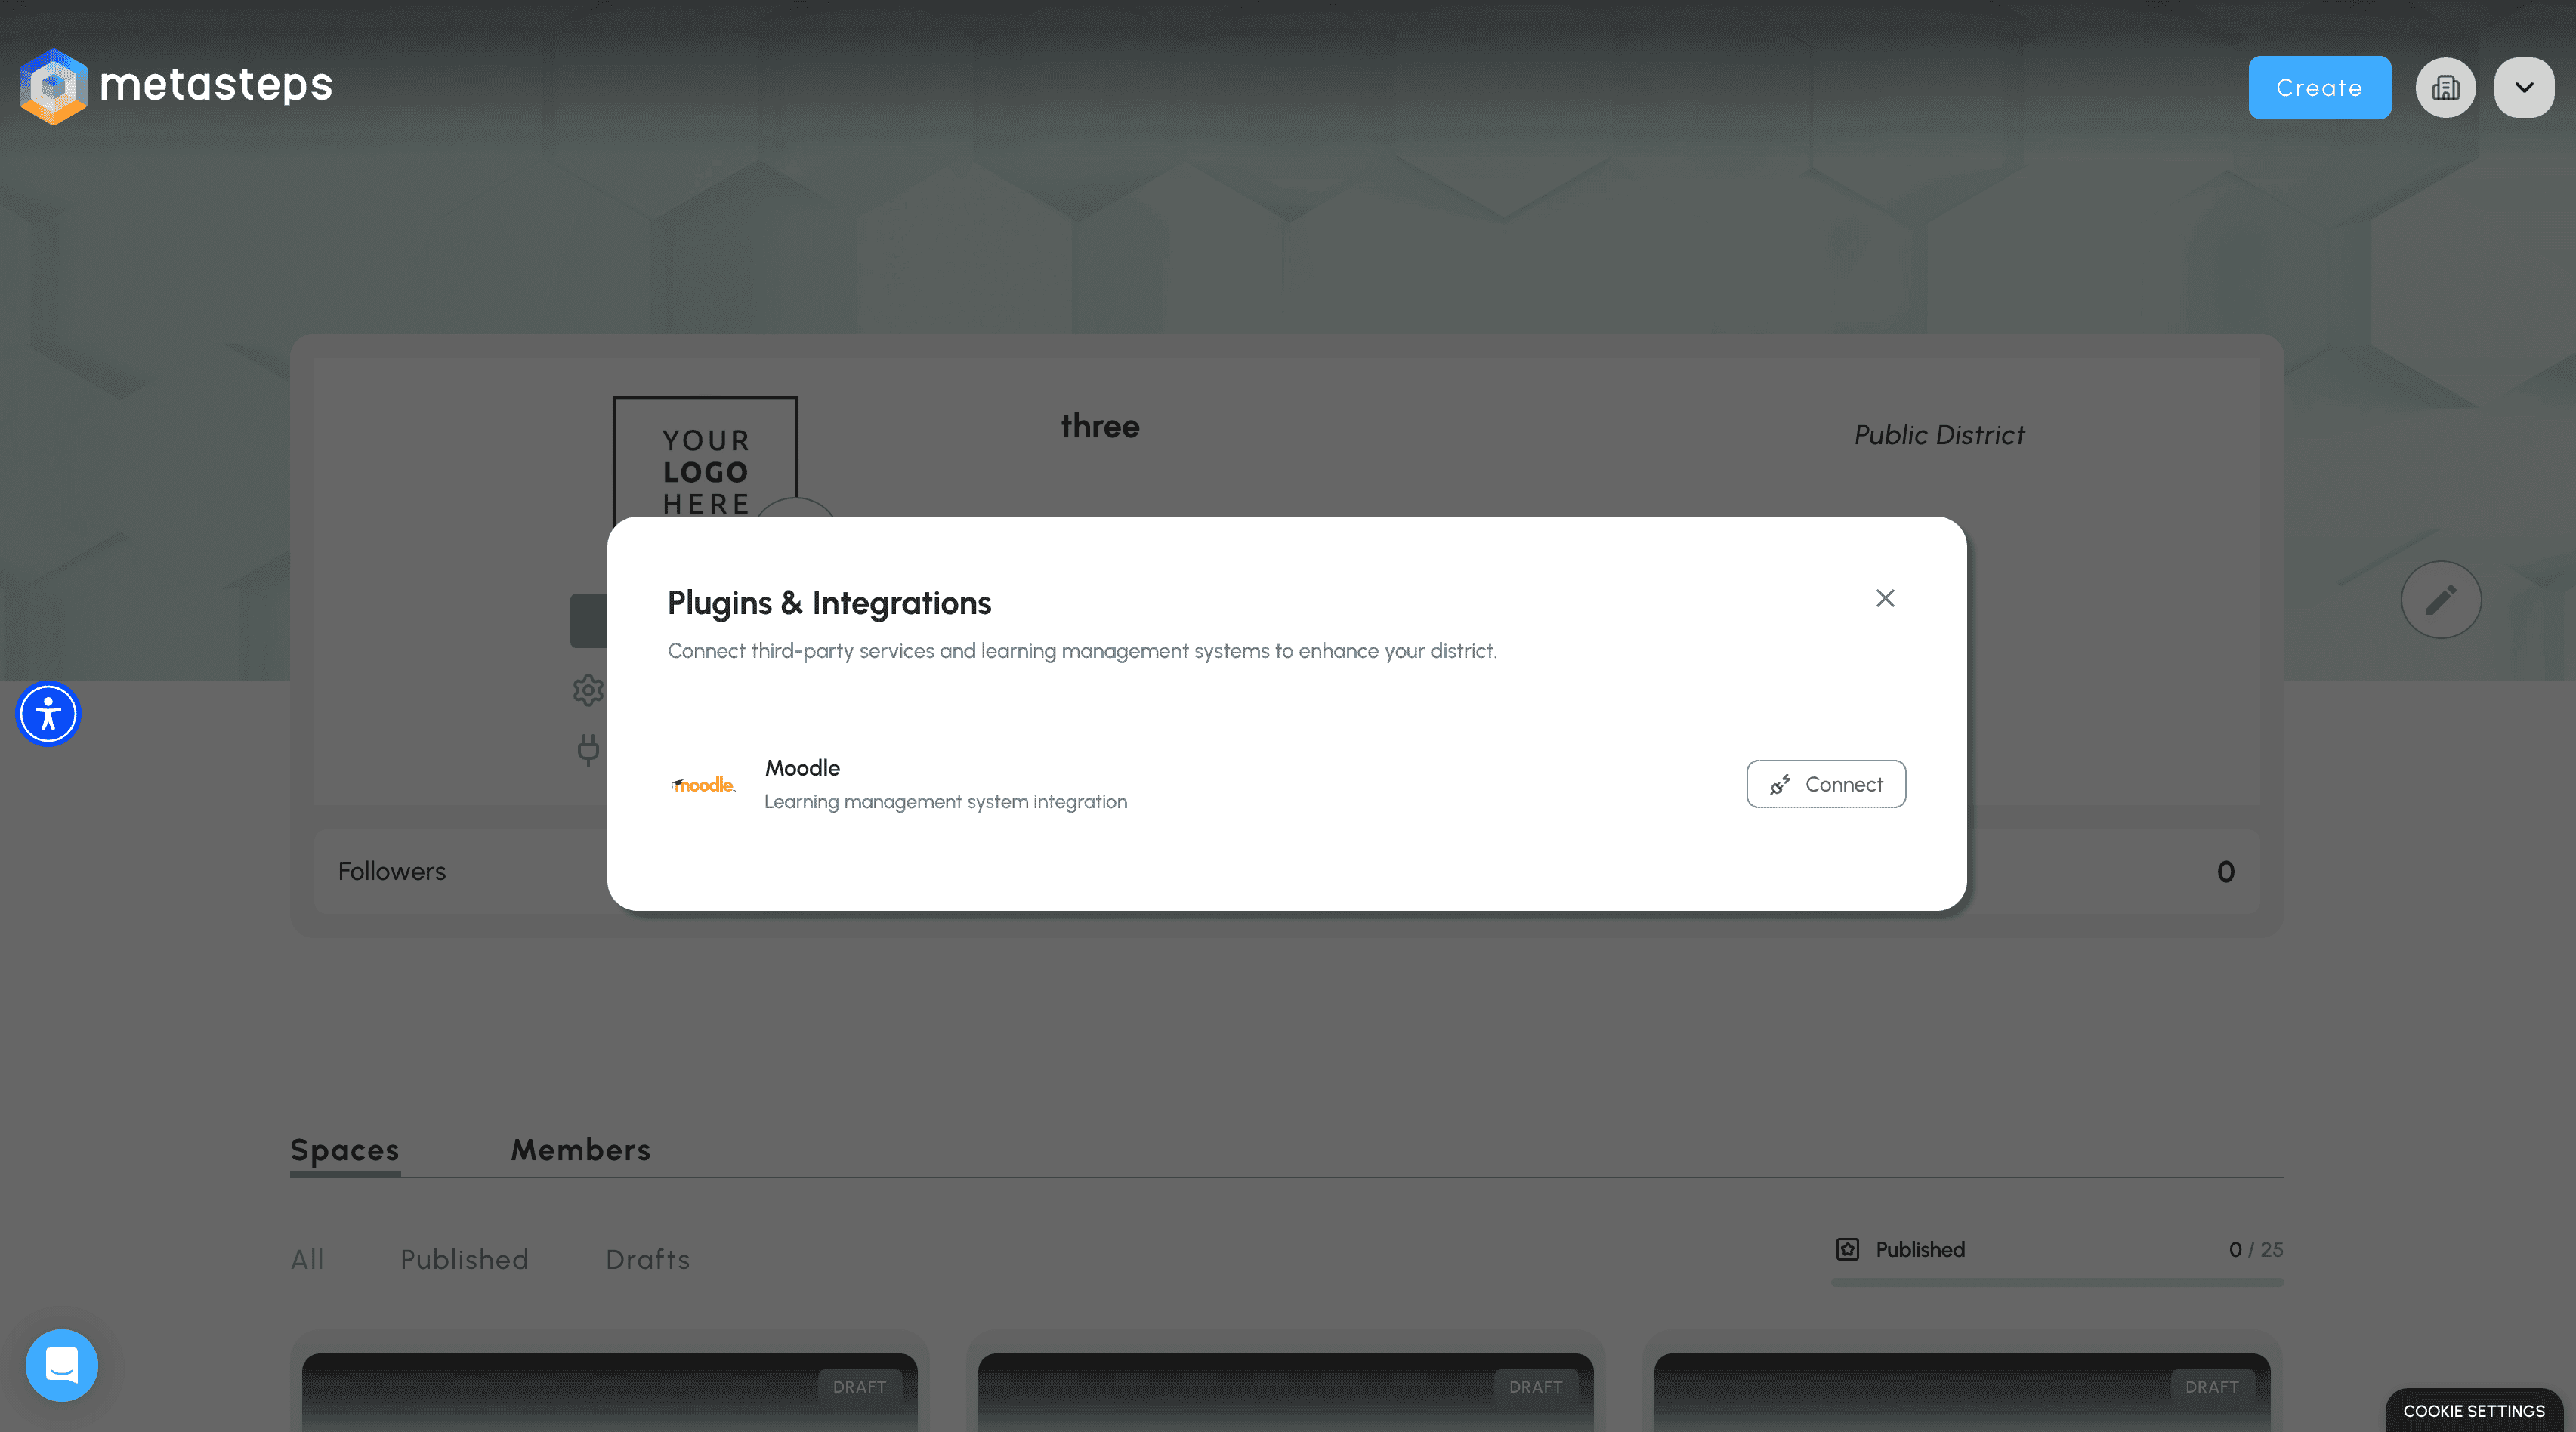
The Plugins & Integrations panel - Moodle is only one click away.
- Enter your URL and token: The Moodle integration setup opens with two fields. Paste the full base URL (including https://) into Moodle Instance URL. Paste the 32-character token from your Moodle admin into API Token. The token must be on a single line; line breaks or trailing whitespace will cause the connection to fail.
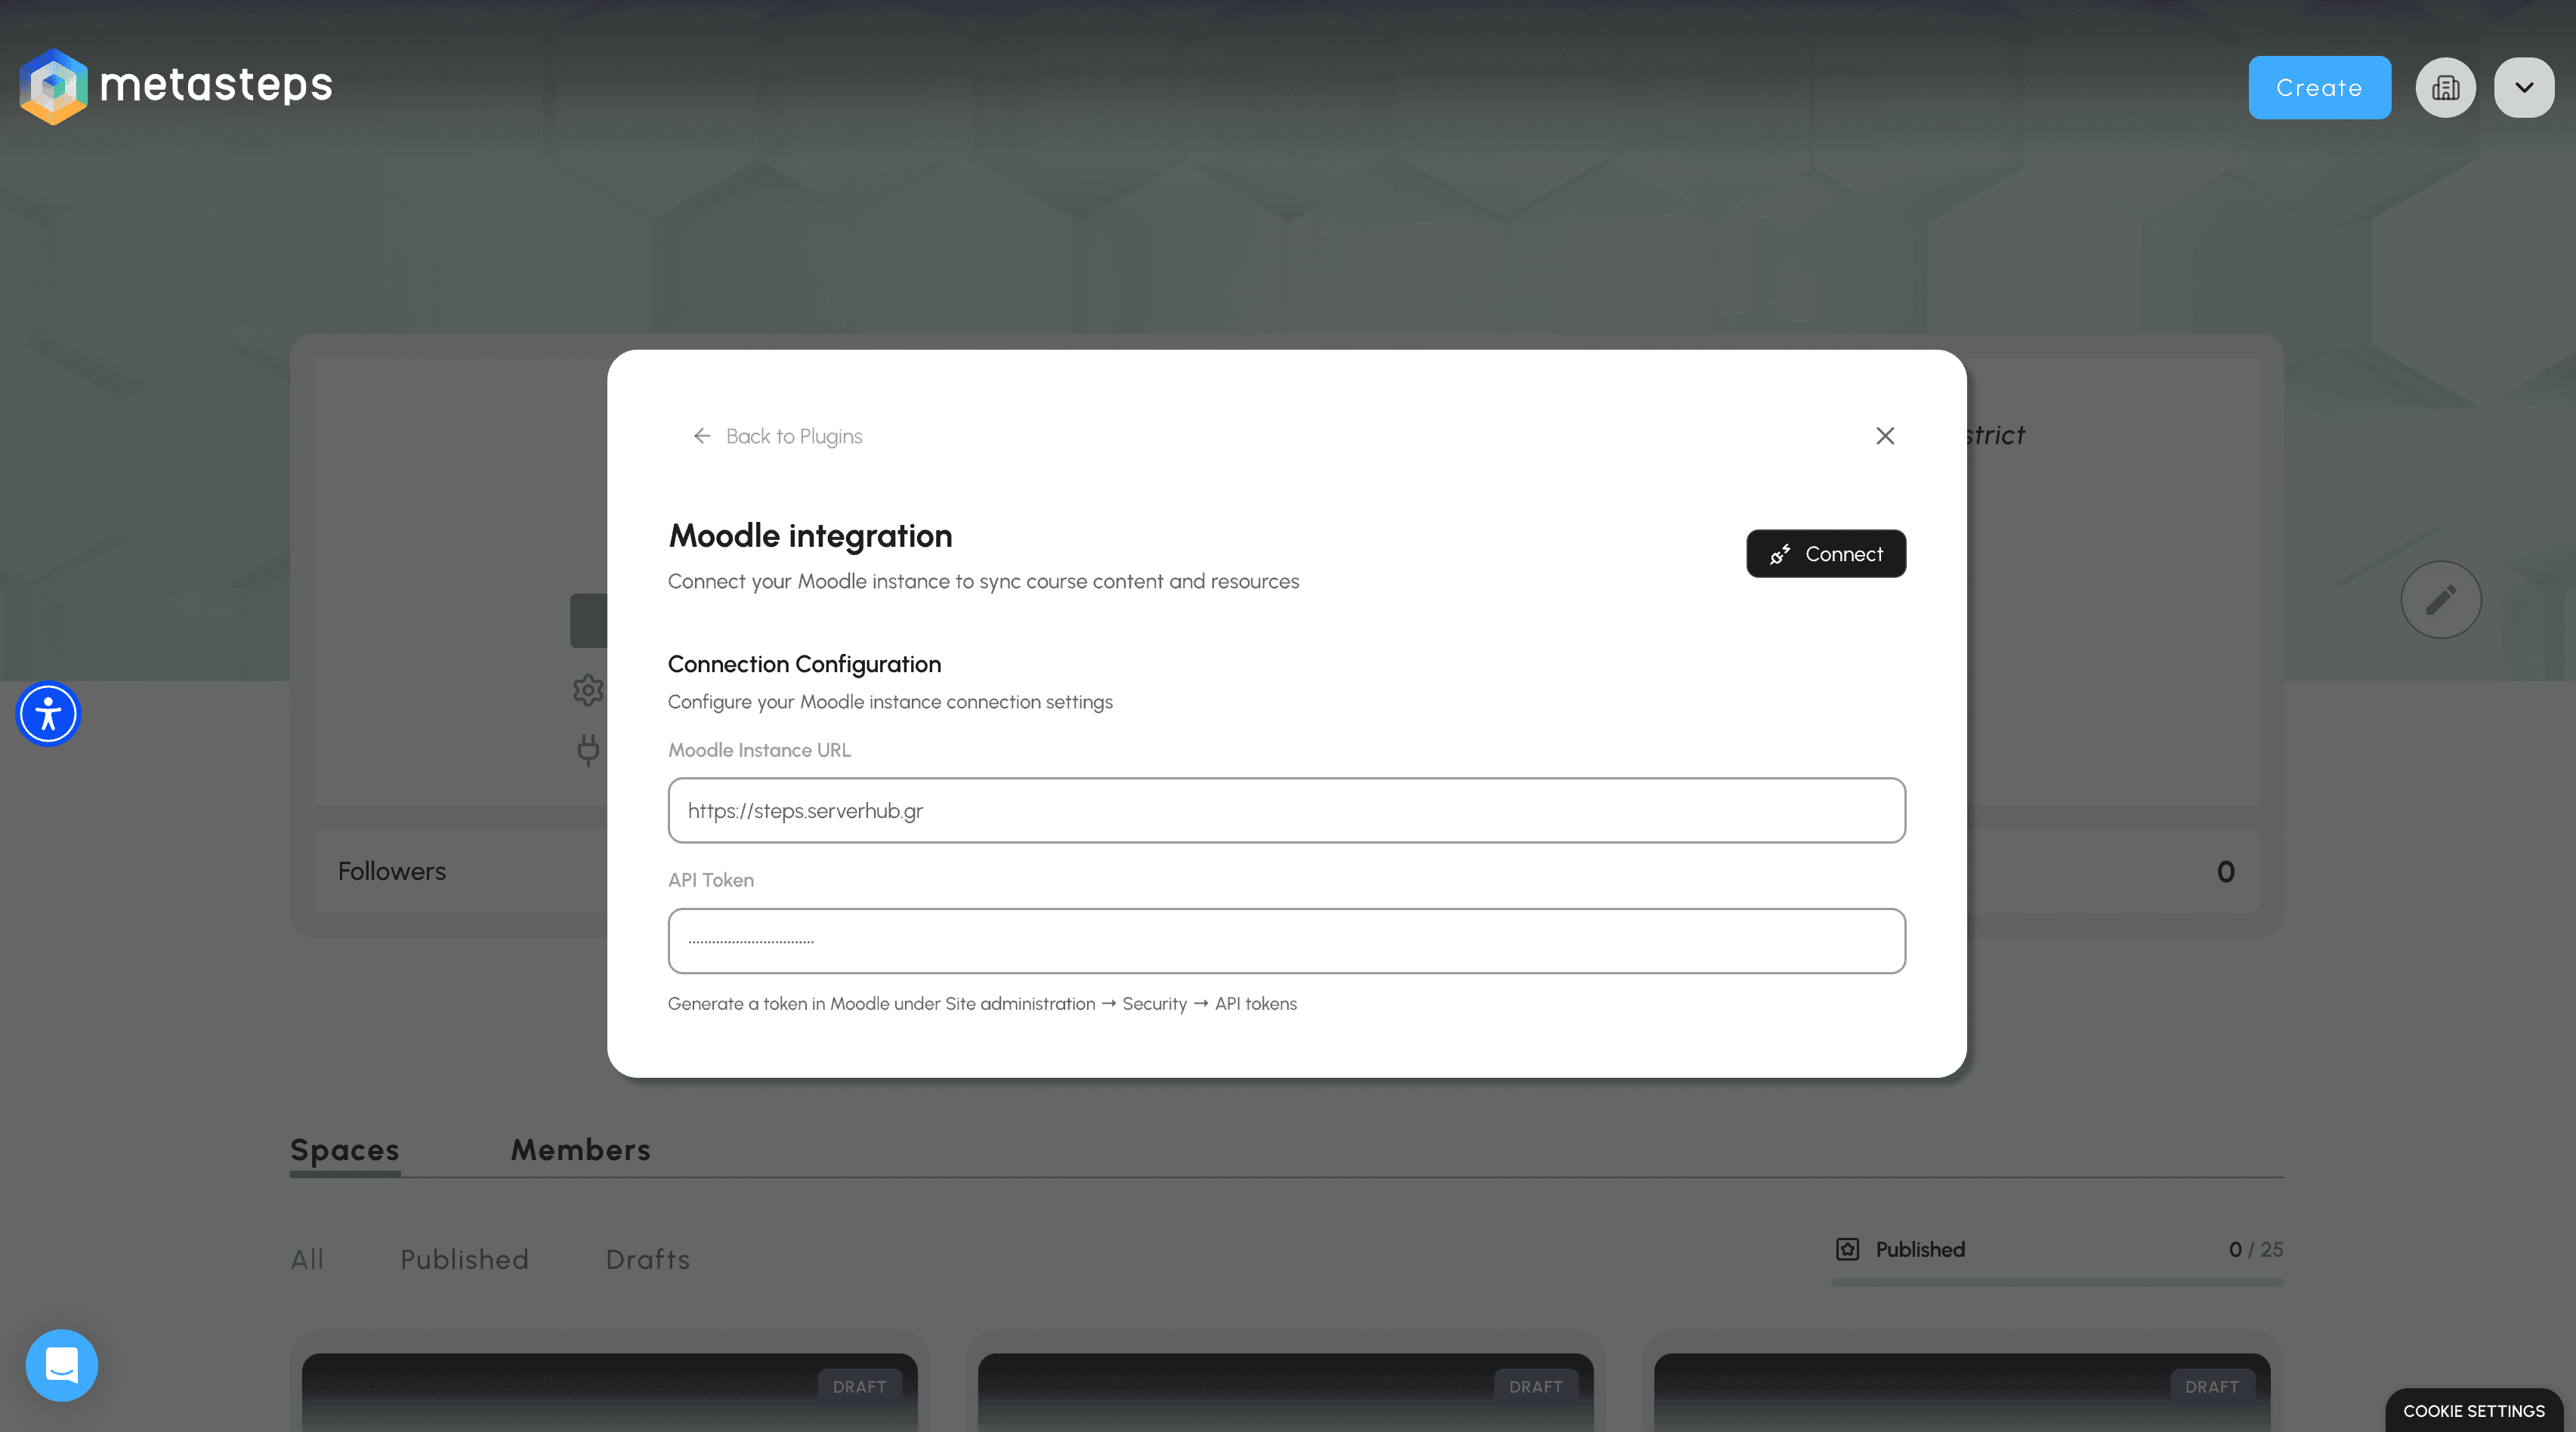
The setup form - Moodle Instance URL and API Token are all you need.
- Click Connect: The Connect button at the top right of the panel validates the token, reads your Moodle's site info, and switches the panel into a Connected state.
Important Note: If the connection fails, the most common cause is a token copied with a line break or extra spaces. Re-copy it on a single line and try again. See Troubleshooting at the end of this guide for less common errors.
2. Review the connection
Once you click Connect, the panel updates to confirm the integration is live and gives you the controls to manage it.
- Connected badge: A green Connected chip with a Last sync timestamp confirms Metasteps is talking to your Moodle.
- Resync: Re-reads your site info and course catalogue. Use this any time your admin changes the API user or you want to refresh the list
- Change Credentials: Update the URL or API token without losing your synced courses.
- Disconnect Integration: Removes the connection entirely.
- Selected Courses: Where the courses you sync will appear. Right after connecting, this section reads "No courses synced yet". The next step fixes that.
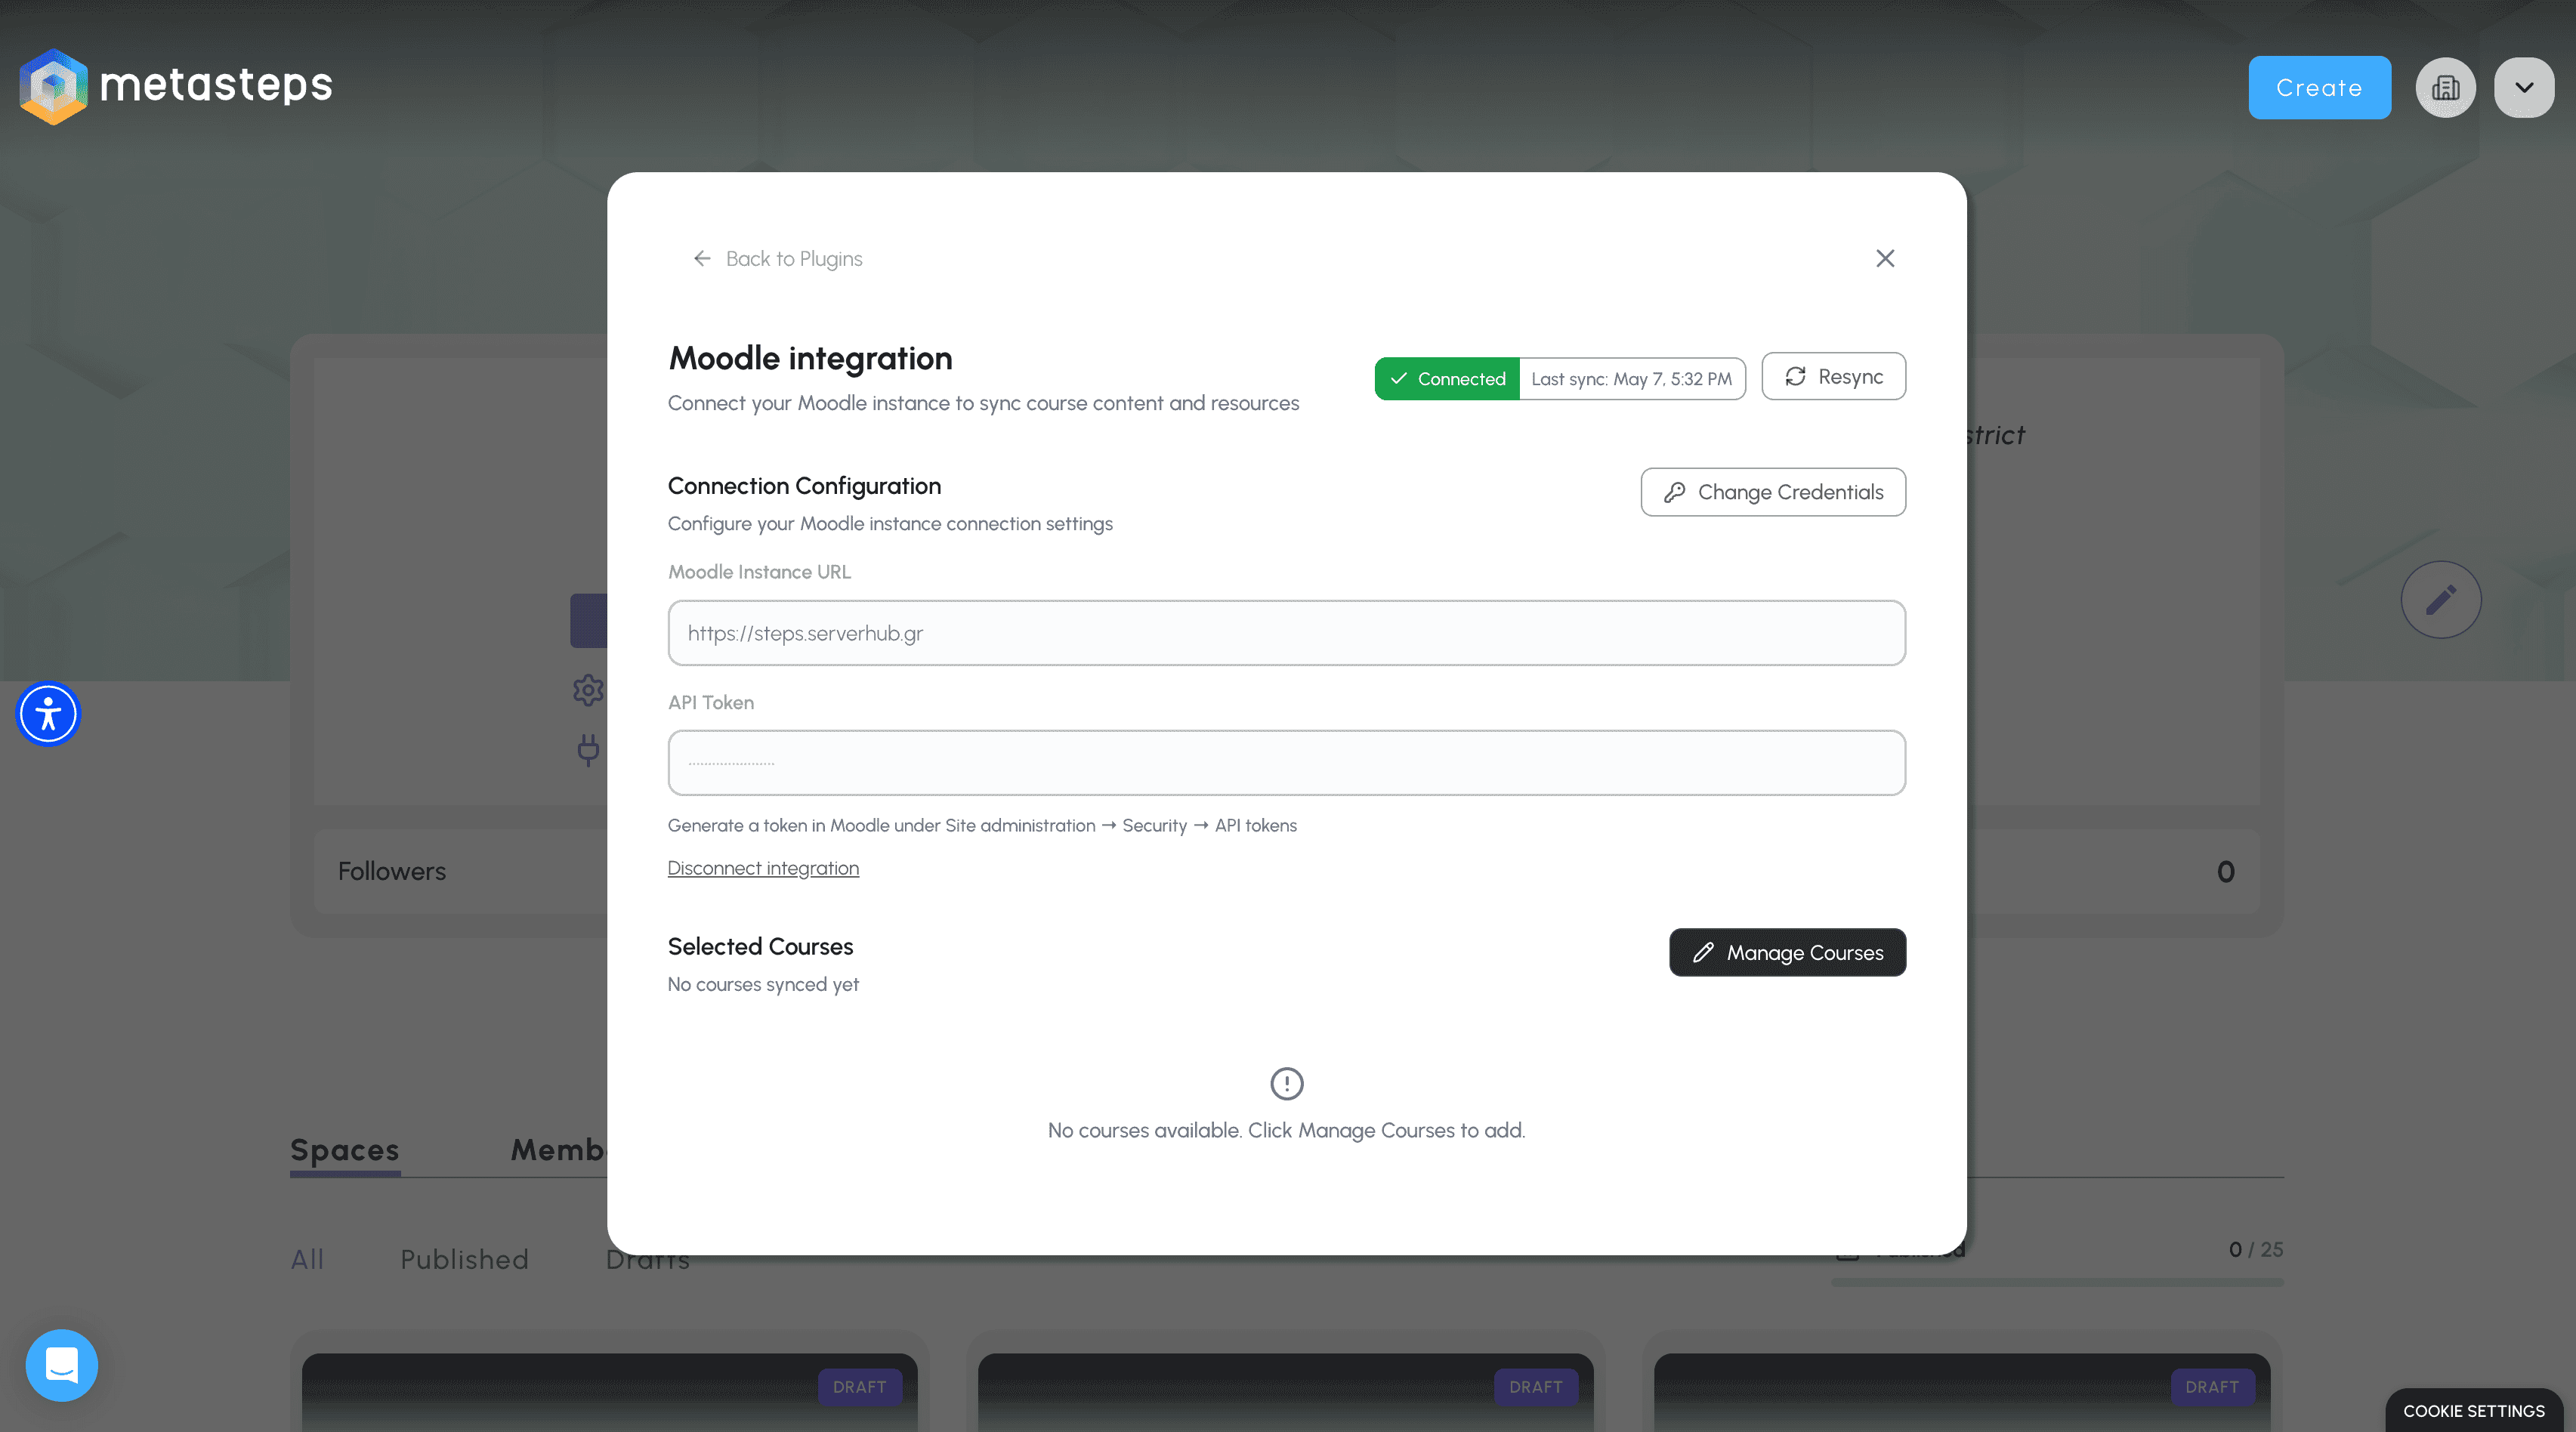
Once connected, the panel shows your last sync time, plus quick access to Resync, Change Credentials, and Manage Courses.
3. Select courses to sync
Selecting a course makes its content available in your district library and tells Metasteps to pull its sections and individual activities.
- Open Manage Courses: Click Manage Courses inside the integration panel. The Select Courses to Sync modal opens with a list of every course your API user can see, including hidden ones. Each row shows the course title and its current resource count.
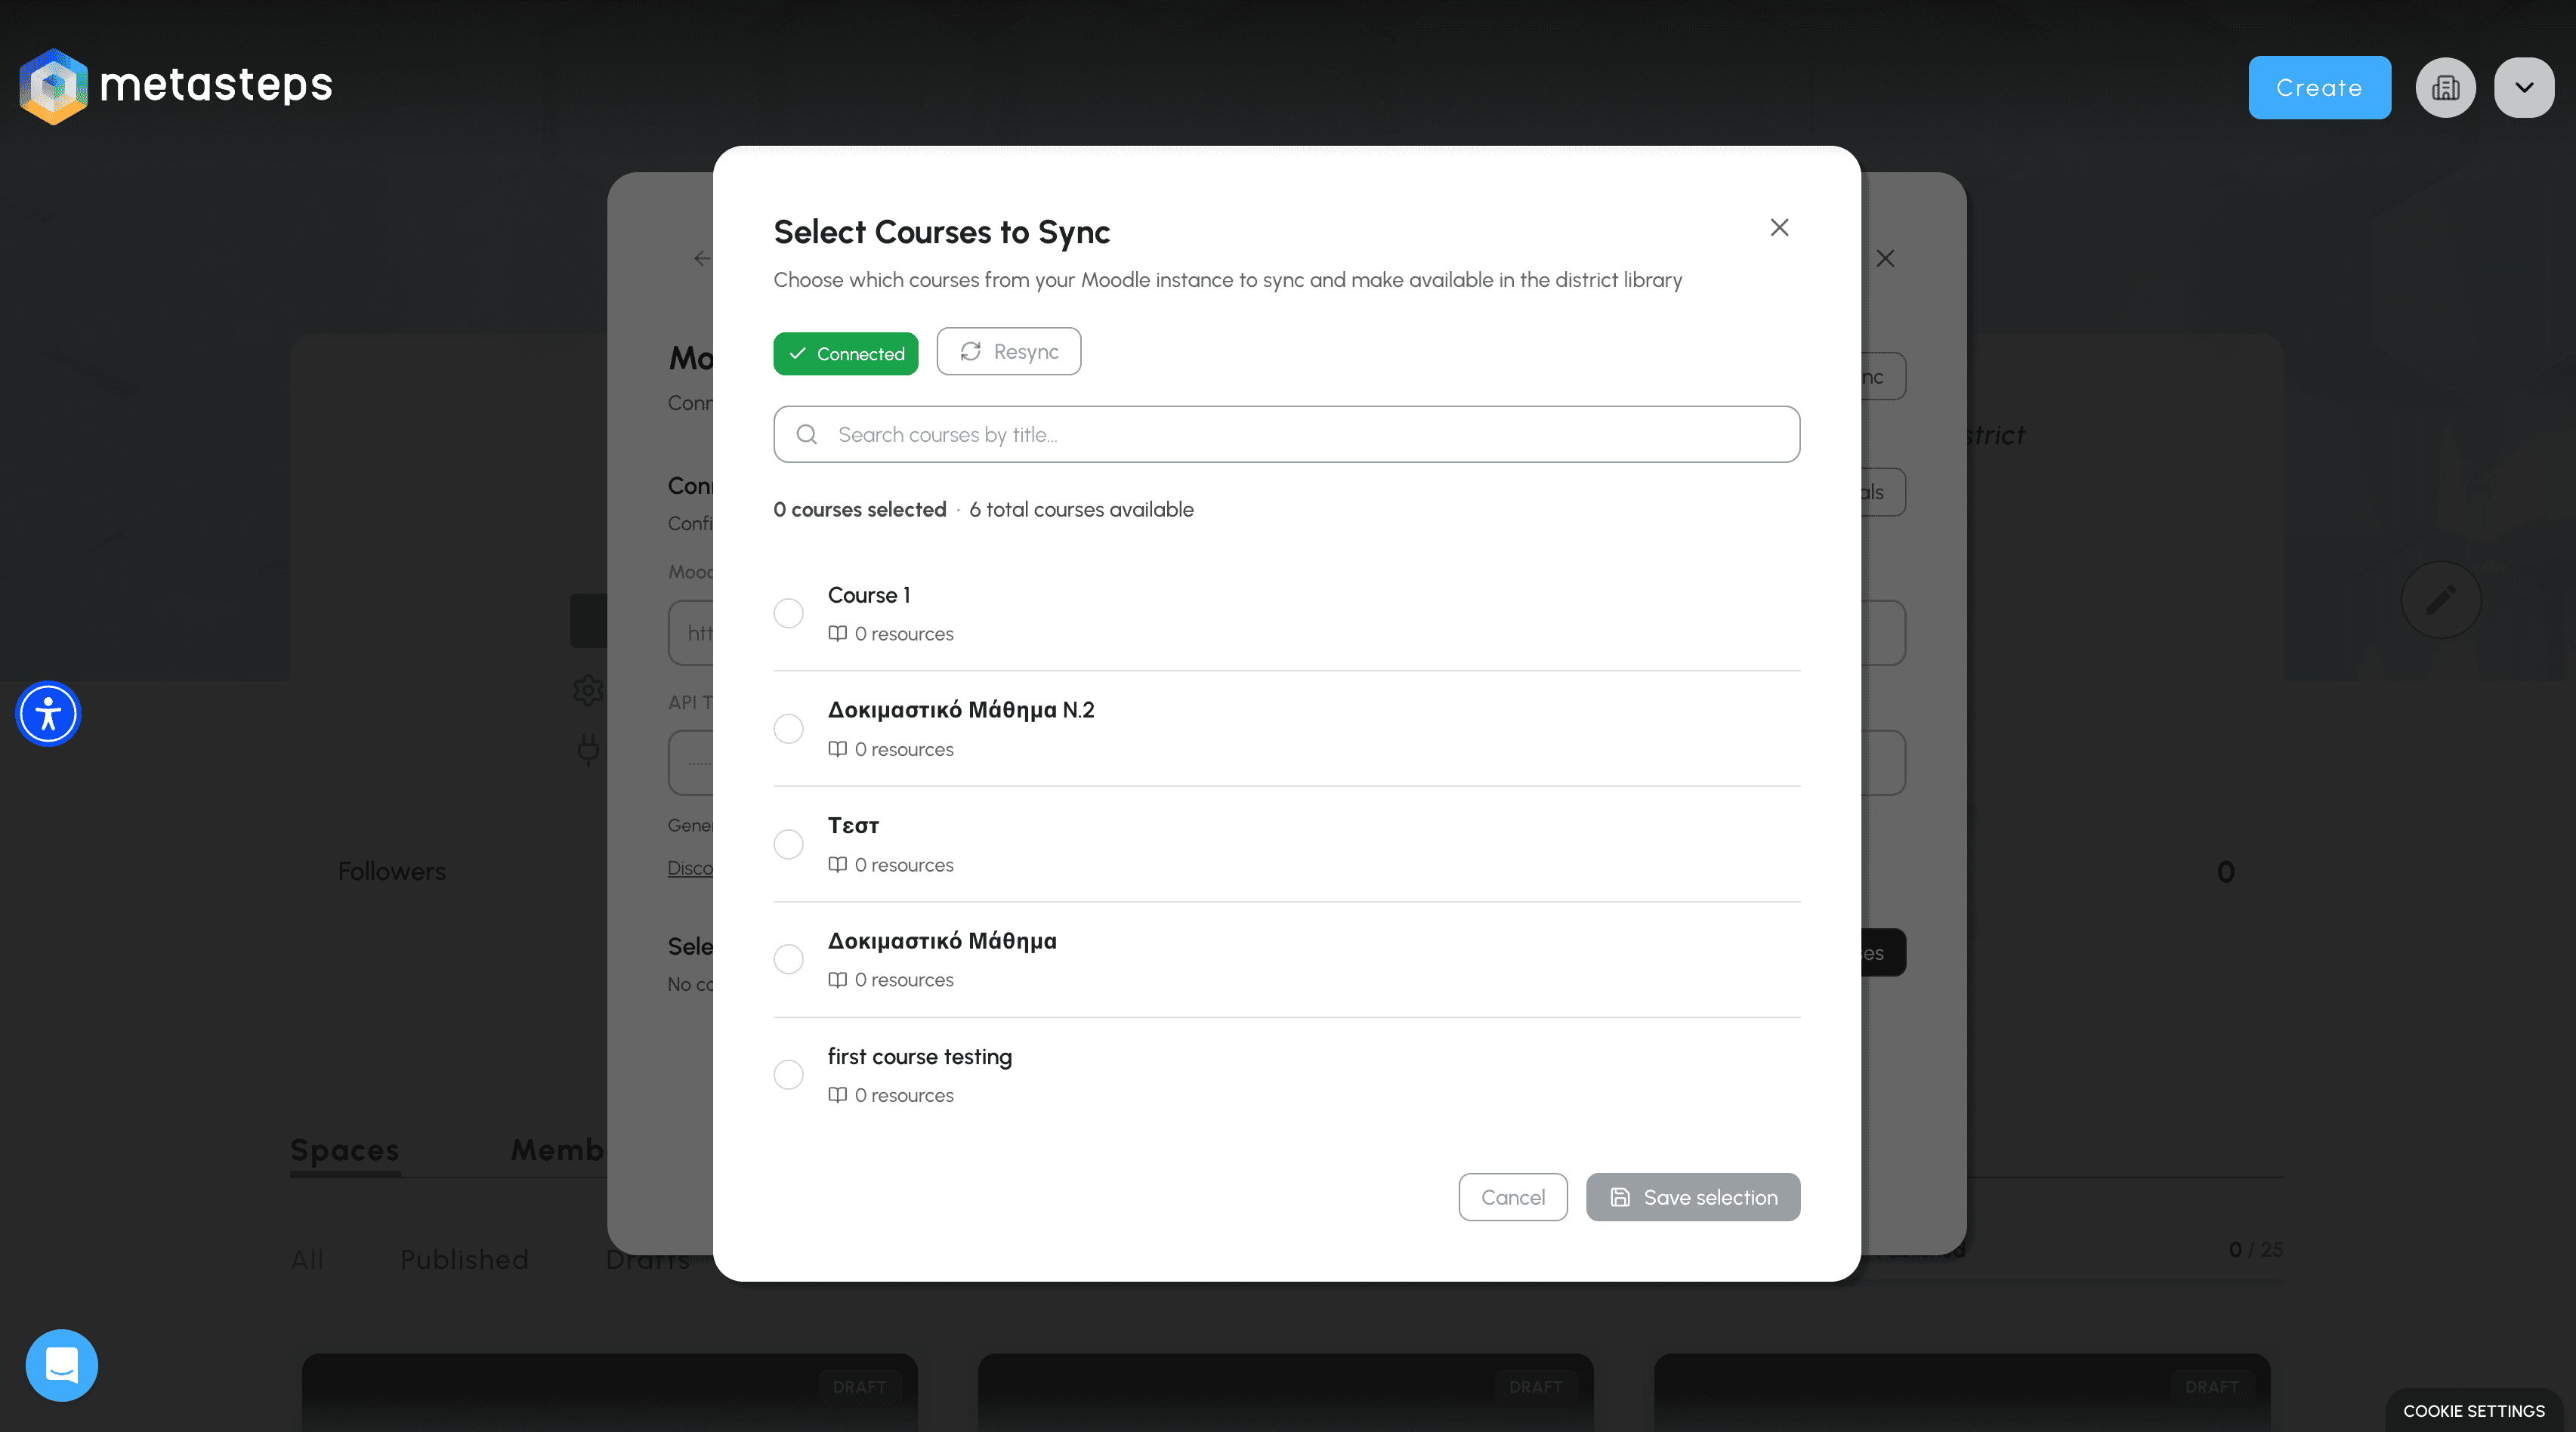
The Select Courses to Sync modal: every course your API user has access to.
- Find what you need: Use the search bar at the top to jump straight to a specific course by title, or scroll the list.
- Tick the courses to sync: Tick every course you want to make available. Don't worry about being too inclusive, only iframe-compatible activities (pages, files, URLs, H5P, SCORM, quizzes) are exposed; forums, chats, and workshops are skipped automatically.
- Save your selection: Click Save selection. Metasteps reads each ticked course's sections and activities and adds them to your library.
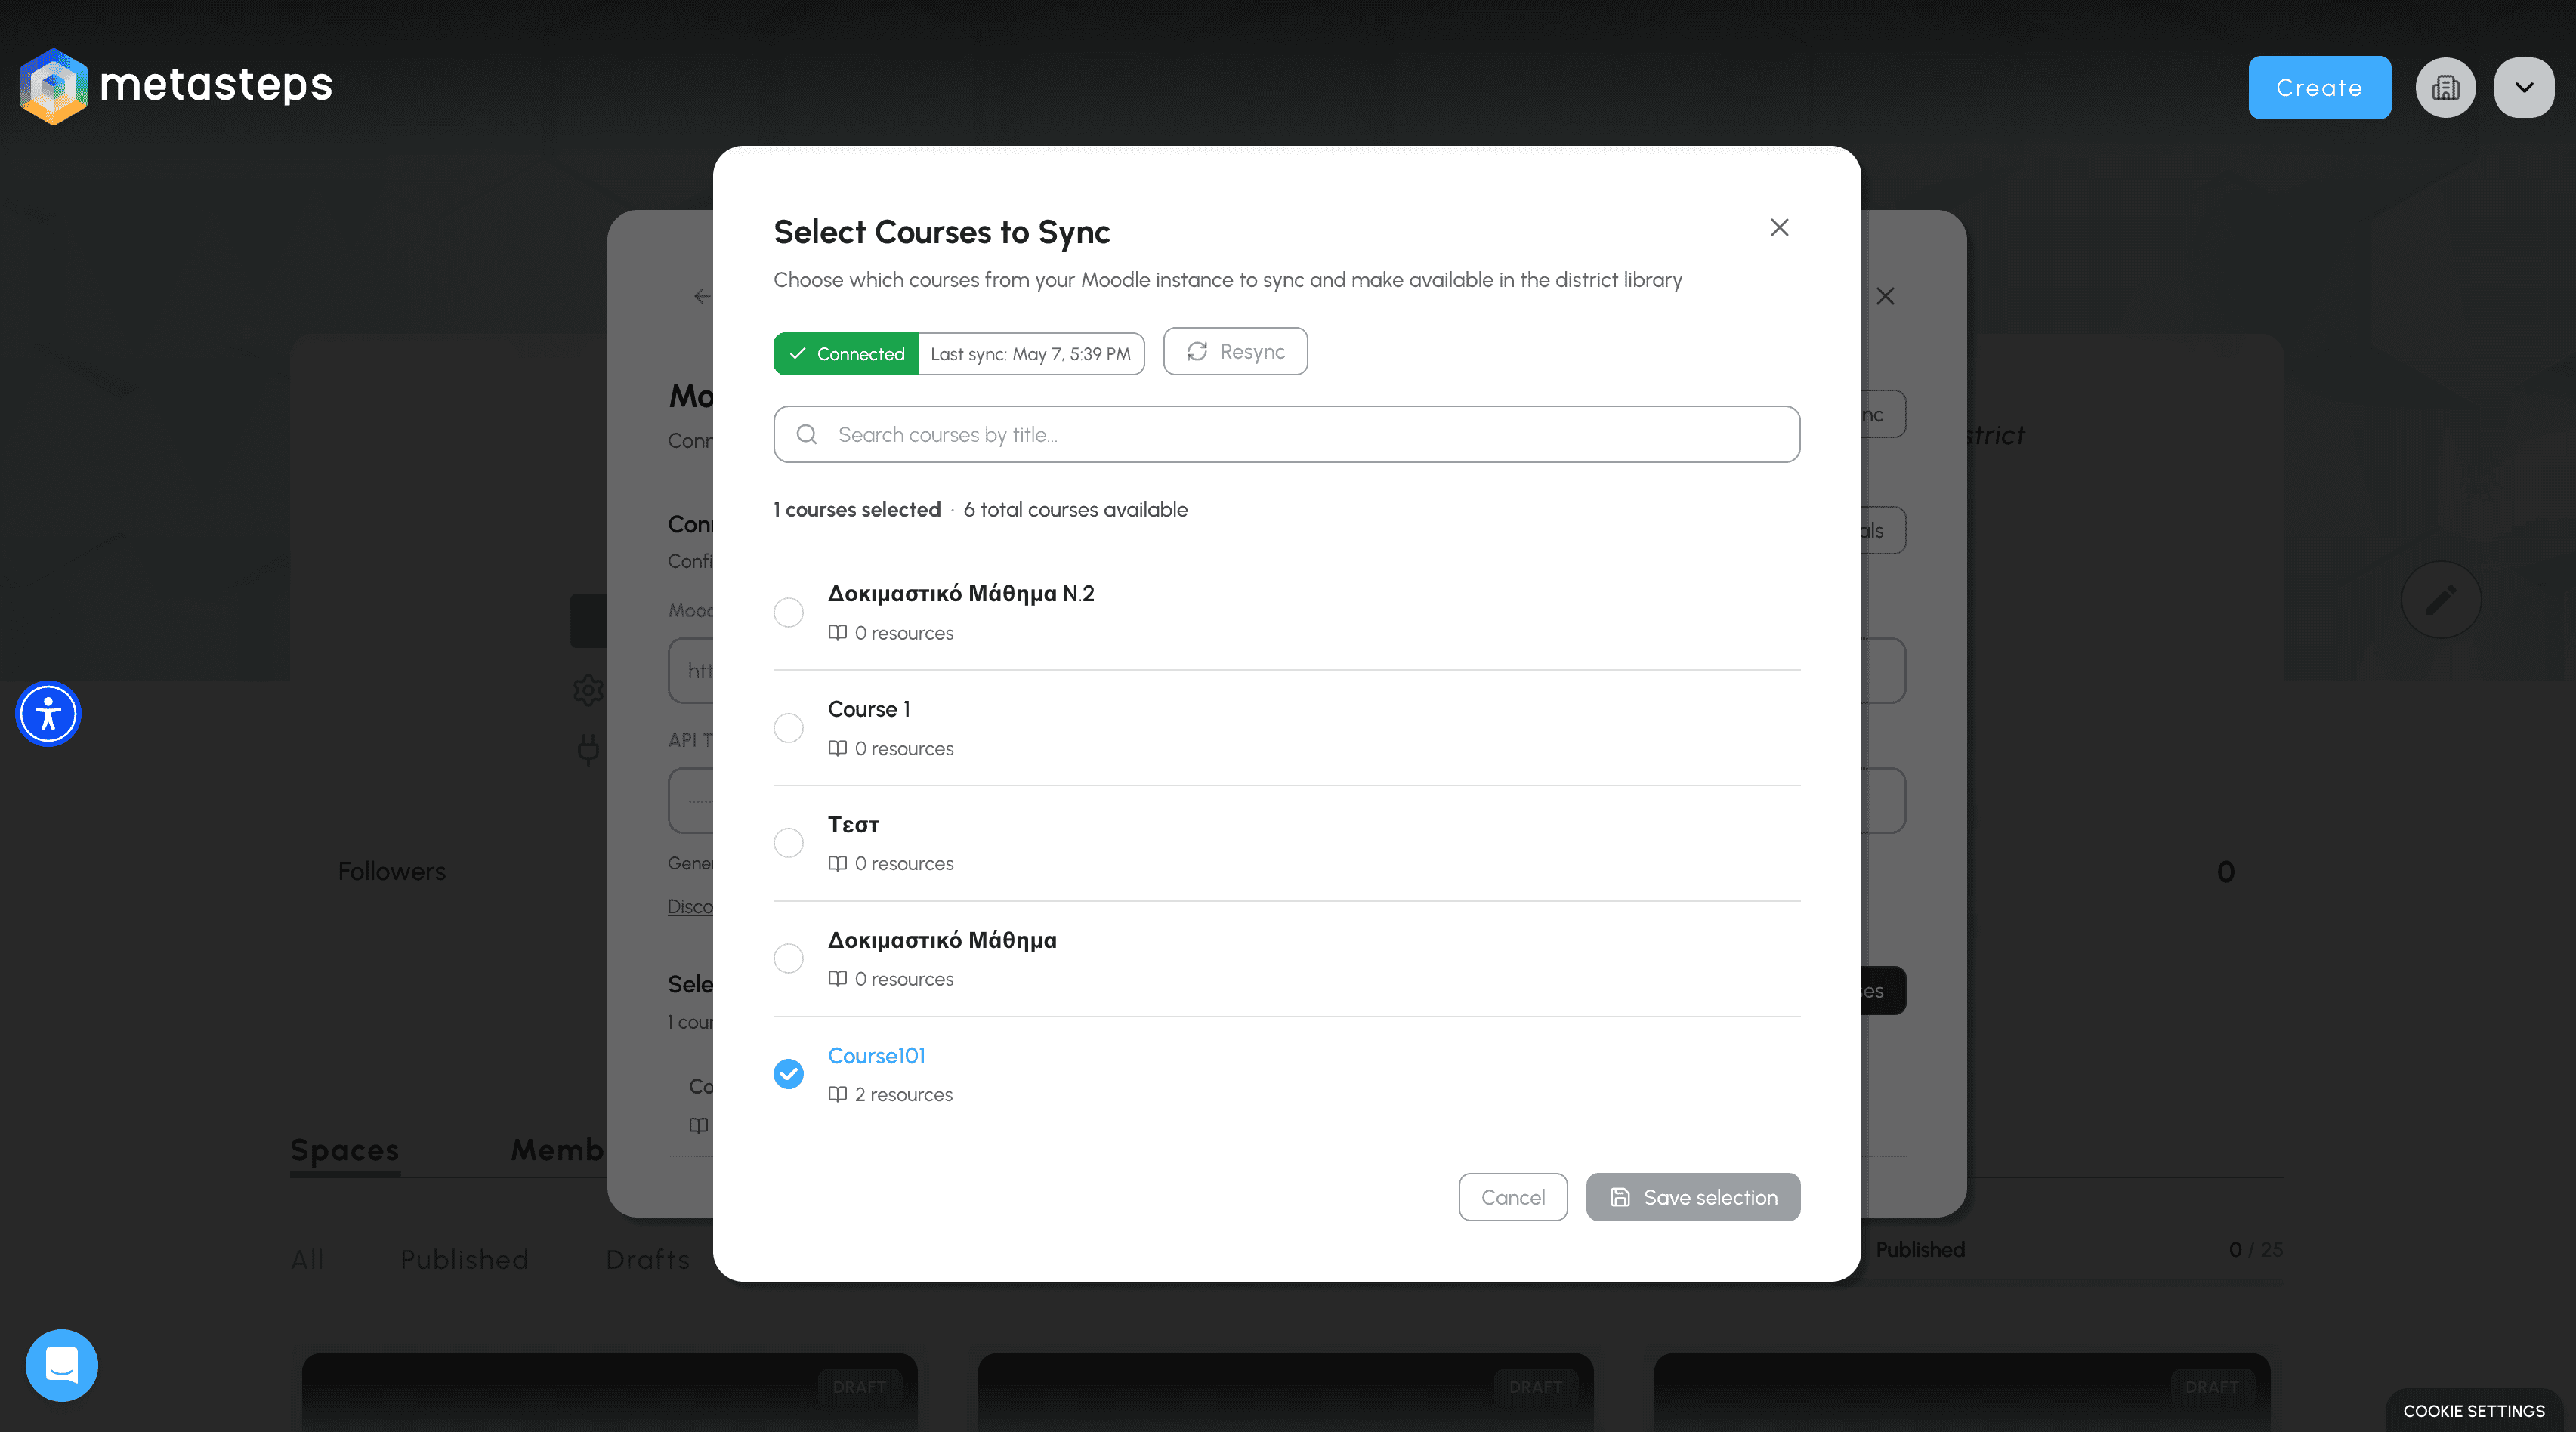
Course101 ticked, Save selection ready to go.
Important Note: Selecting a course only exposes its content to your library. It does not enrol students, enrolment is managed in Moodle as usual. If a student isn't enrolled in the source course, the panel will show Moodle's "You cannot access this course" page when they try to view it inside a 3D space.
4. Confirm the synced library and hand it off
Once you save, a Moodle tab appears on your district page next to Spaces and Members. This is where your team will see exactly what they have to work with
- Open the Moodle tab: Each synced course appears as a card with its title and a count of items.
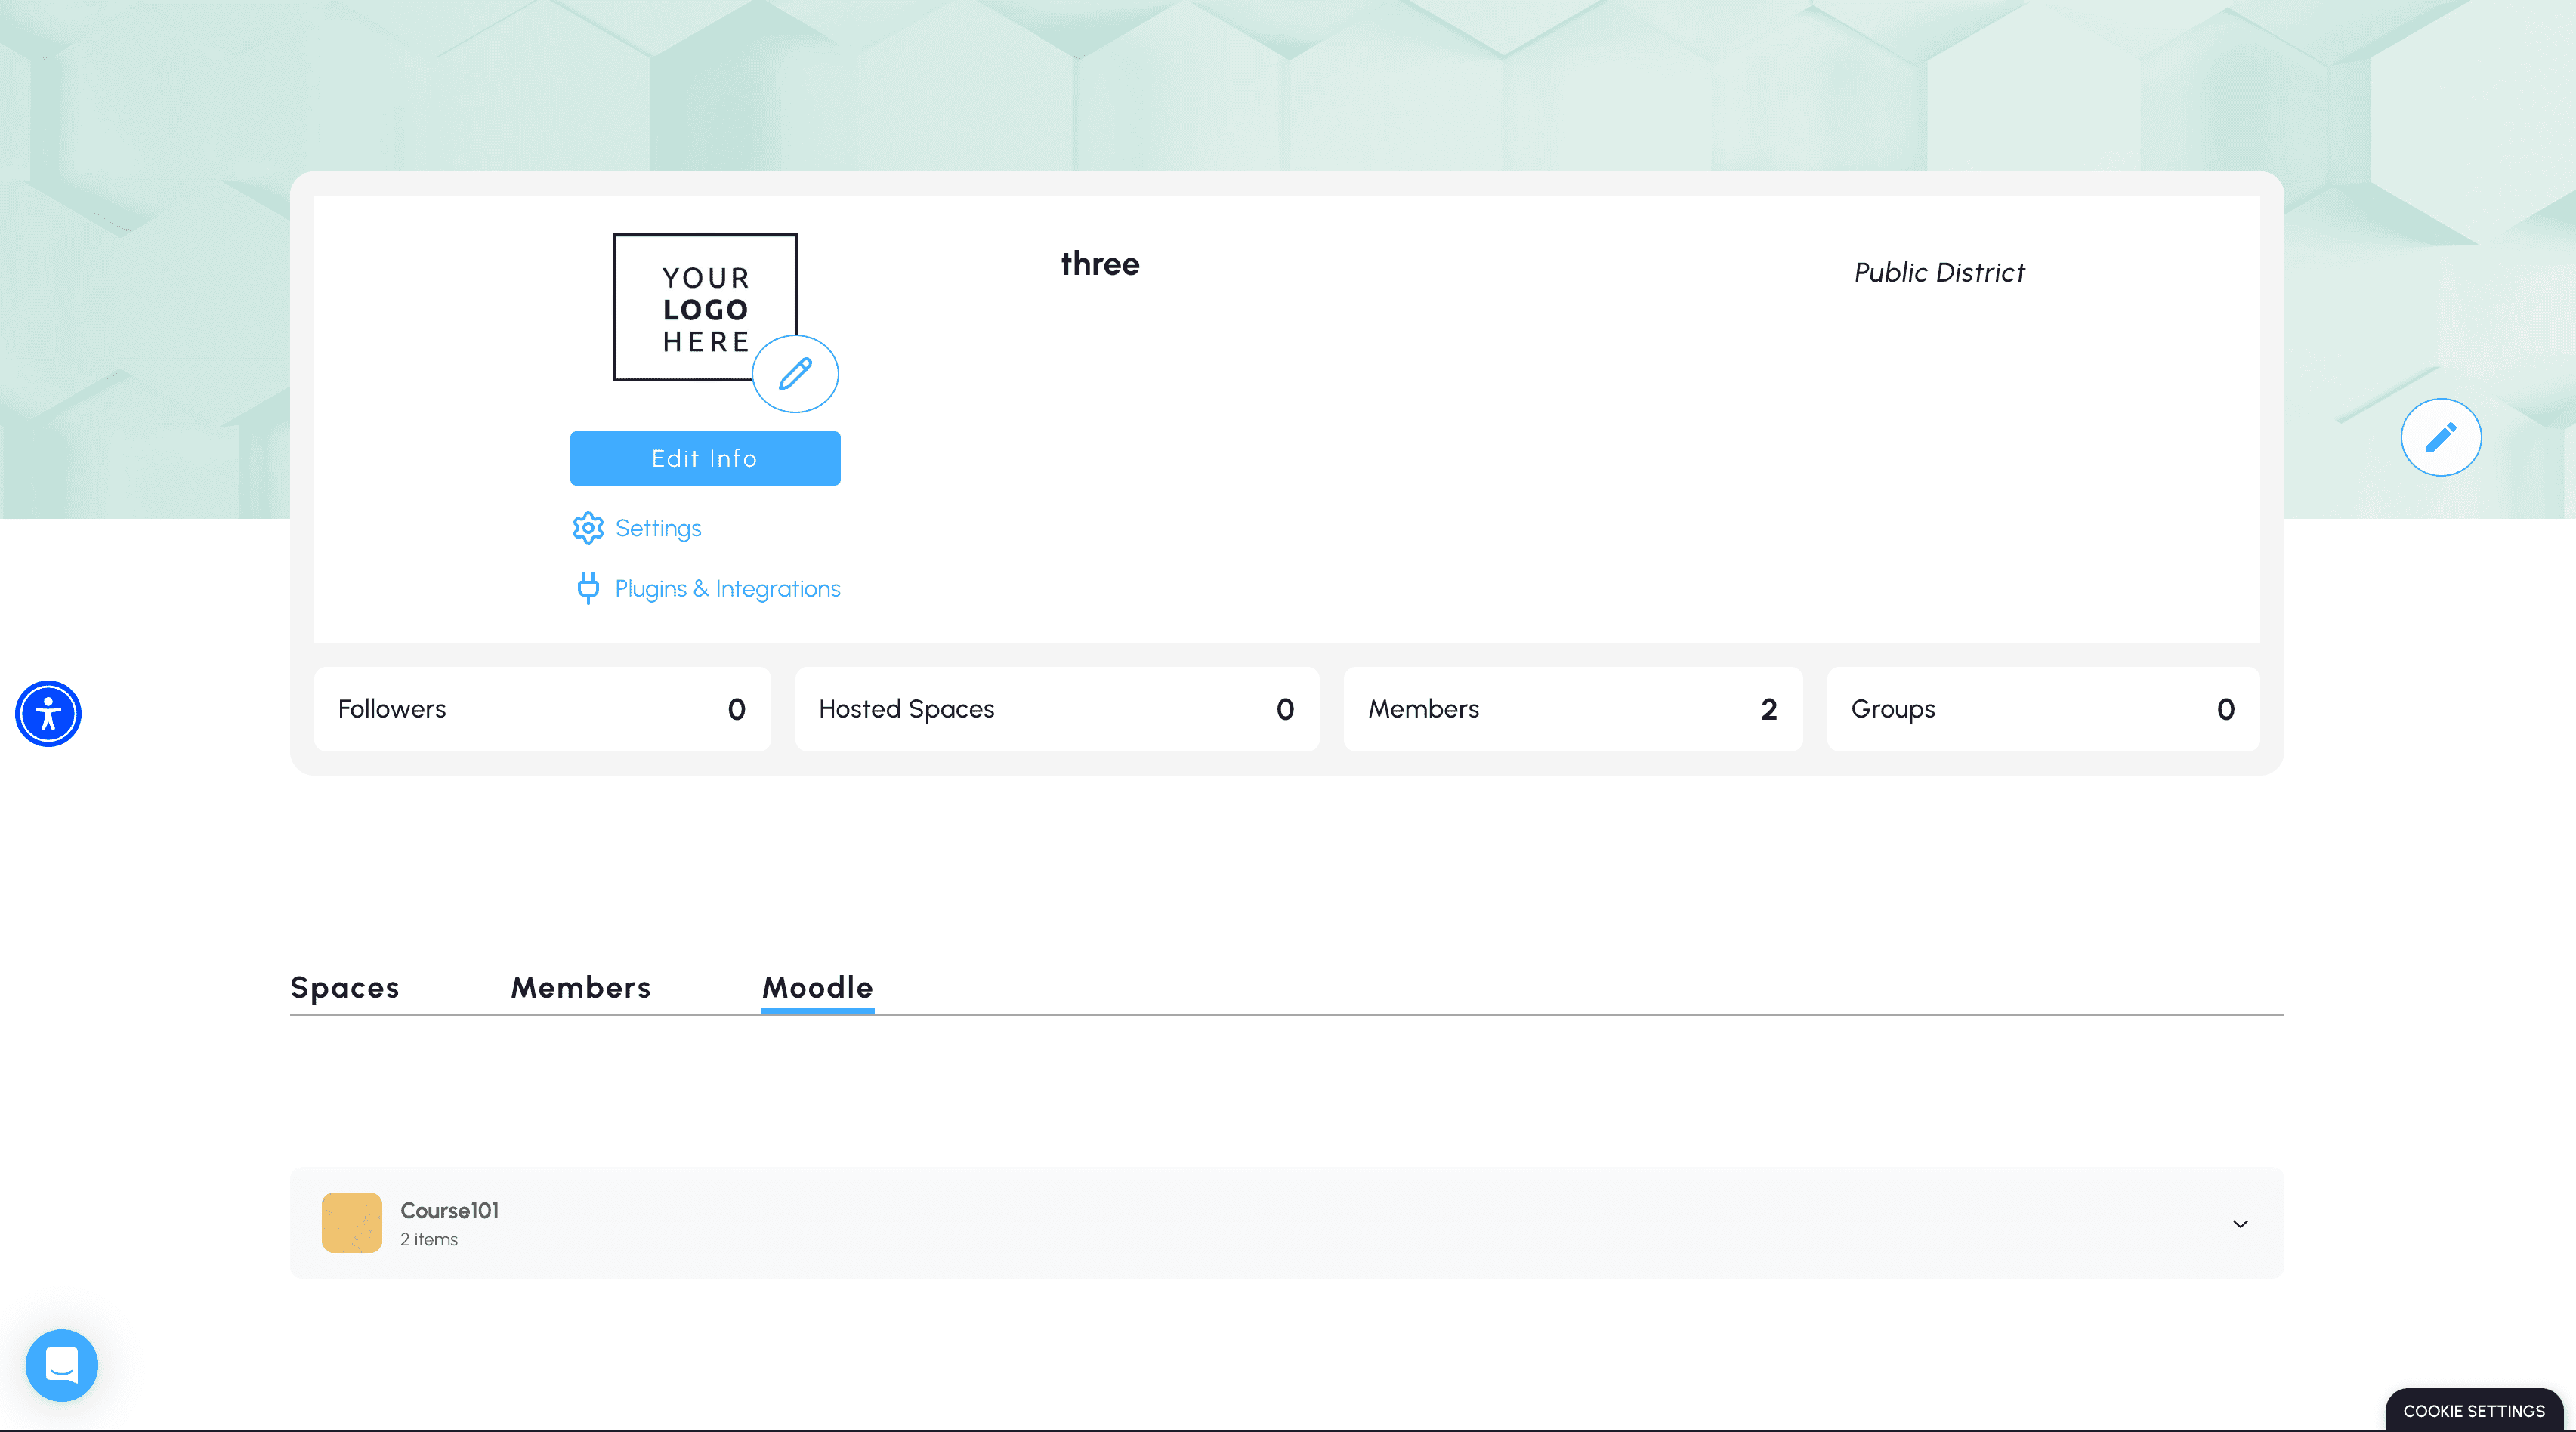
The new Moodle tab on your district page, with Course101 synced and ready.
- Expand a course: Click a course to see its Chapters and individual activities. Every page, file, URL, H5P, SCORM, and quiz is listed with its type label so your team can pick the right one.
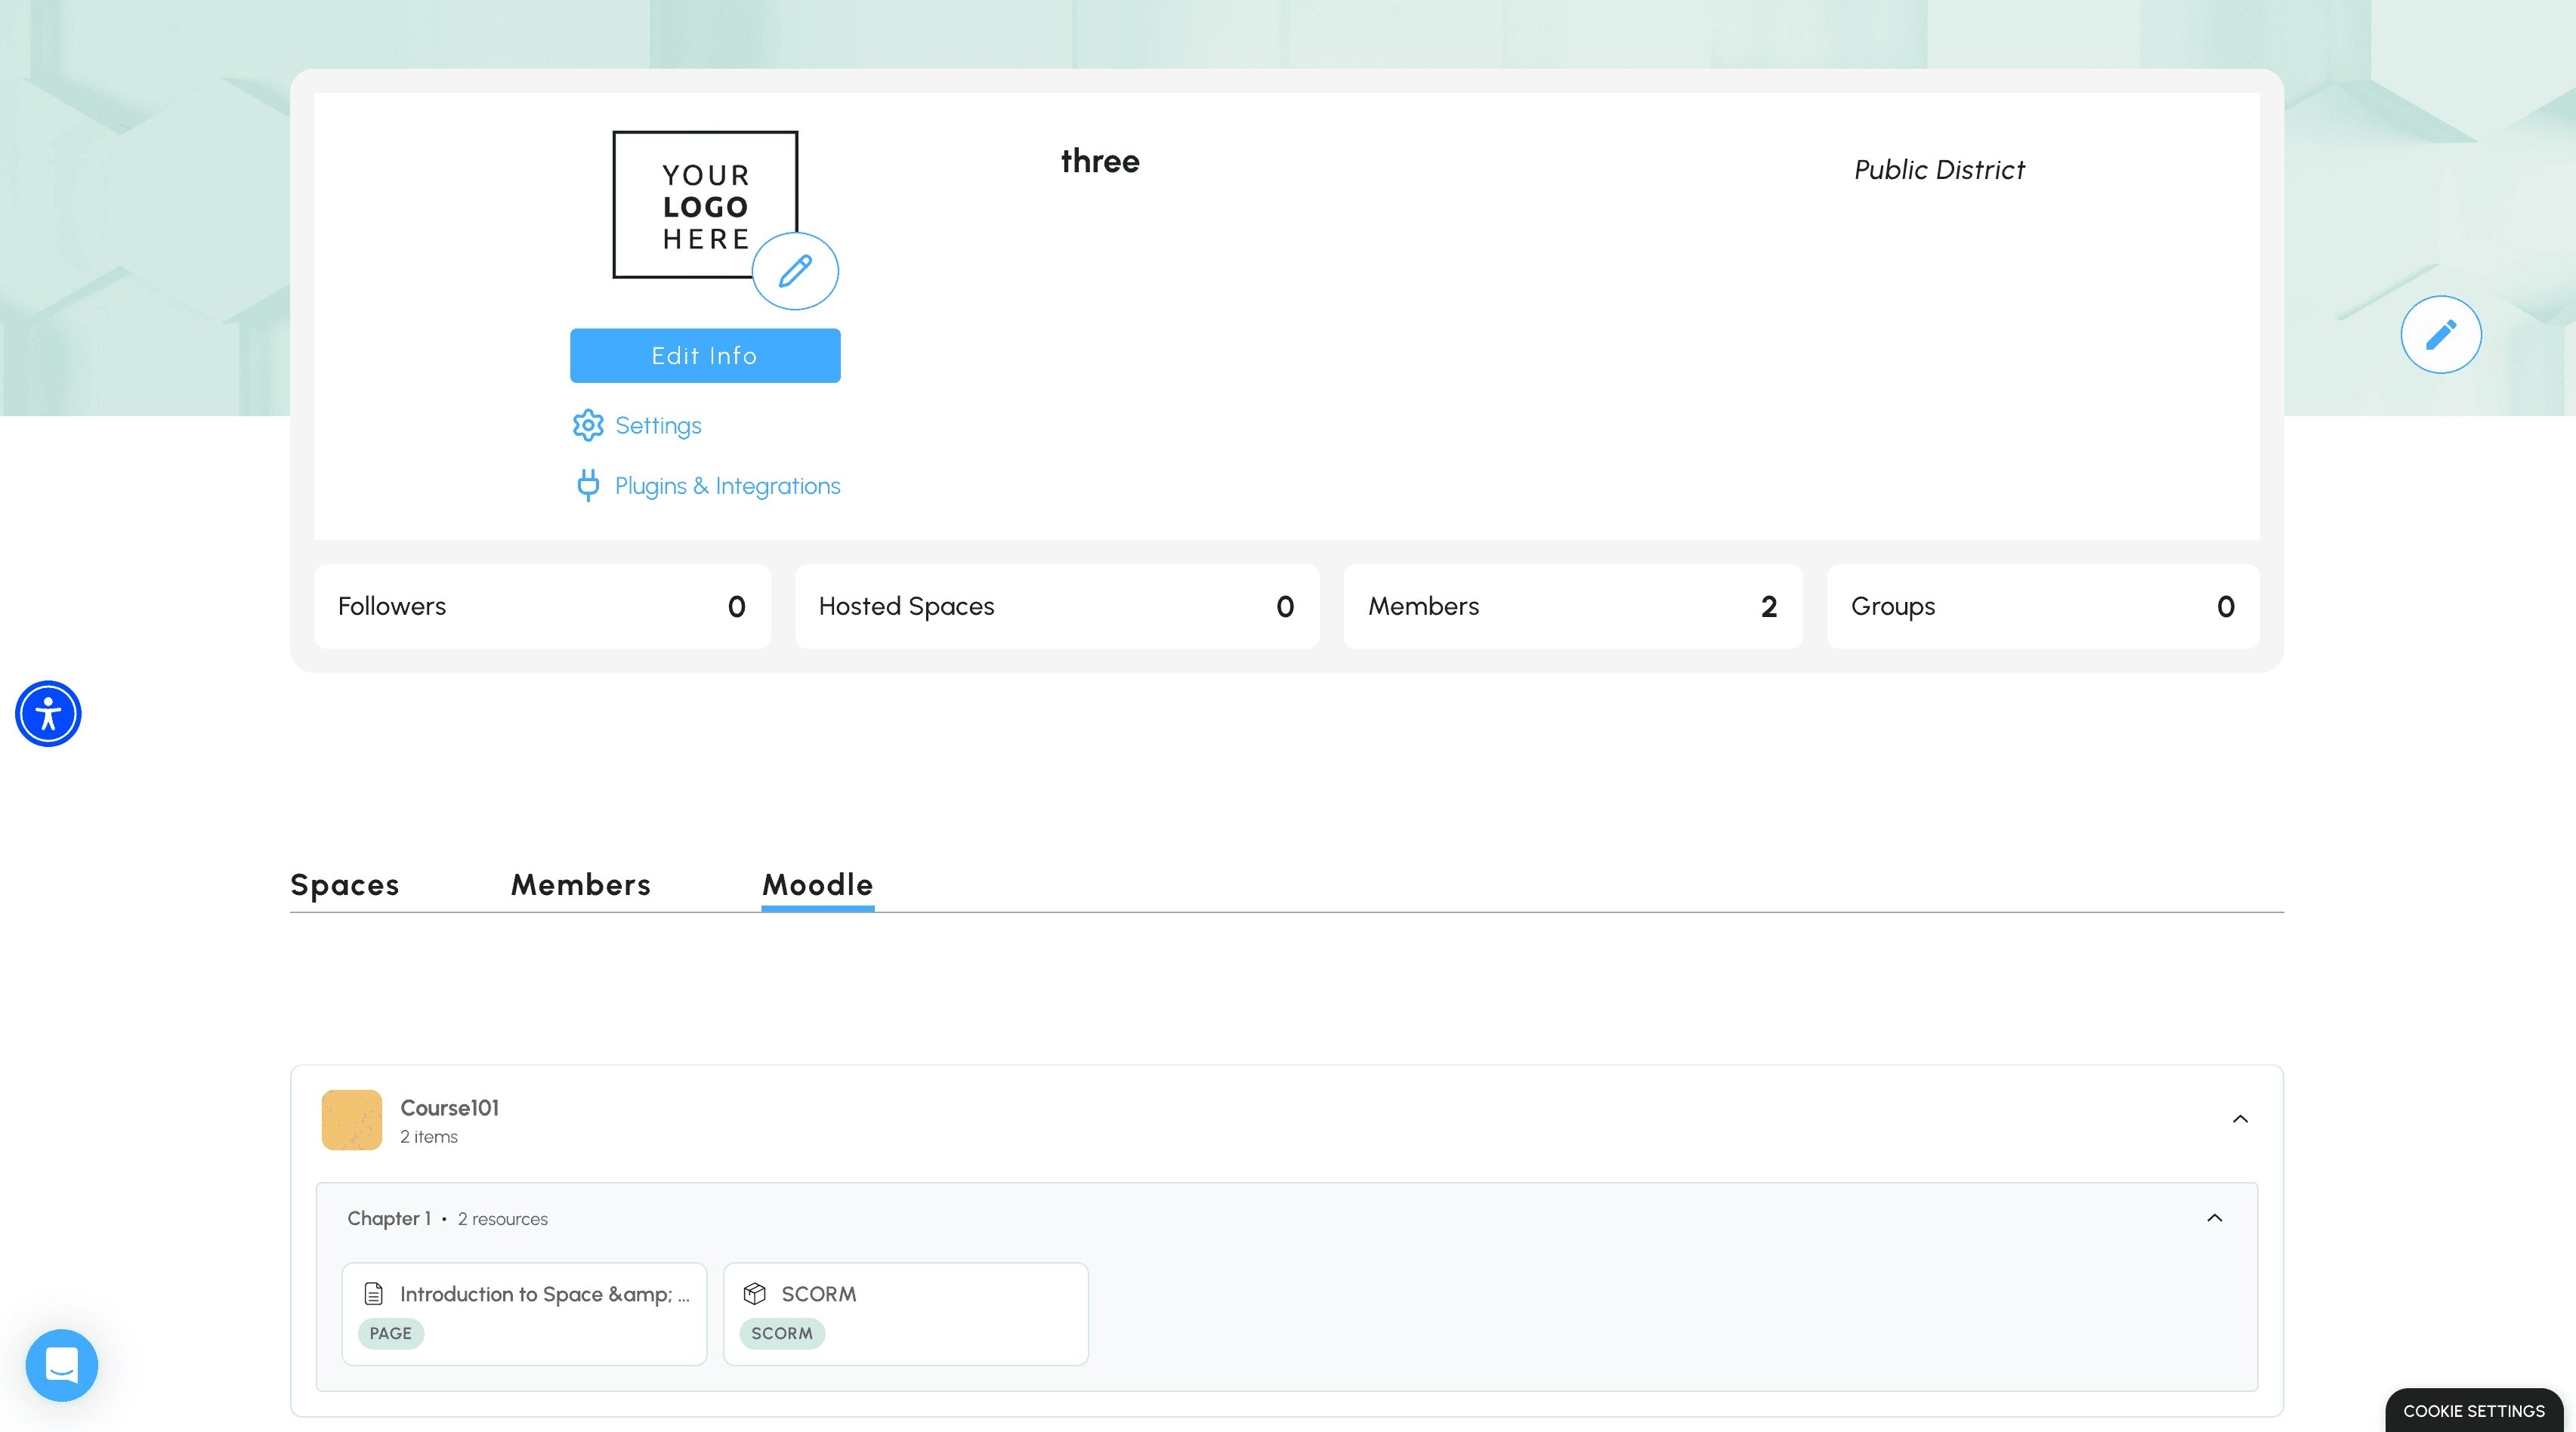
Expand a course to see every section and activity available to your team.
- Notify your team: With at least one course visible in the Moodle tab, members of your district can now open the 3D editor, browse the synced courses, and drag any compatible activity directly into a scene. Send them the companion guide Use Moodle content in your 3D space.
Important Note: Metasteps doesn't sync continuously. Click Resync on the integration panel (or open Manage Courses and re-save your selection) when teachers add or change resources in Moodle. A scheduled background re-sync runs daily as a safety net for everything else.
Troubleshooting
If something looks off, here are the most common errors and their fixes.
- invalidtoken: Token copied with a line break or extra spaces. Re-copy it on a single line and try again.
- accessexception: A required Moodle Web Services function is missing from the integration service. Ask your Moodle admin to add it (see Appendix).
- webservice_access_exception: The metasteps_api user isn't authorised on the Metasteps Integration service. Your admin needs to add it under Authorised users.
- Iframe not loading in 3D space: Frame embedding is blocked by Moodle. Your admin enables Allow frame embedding under Site administration → Security → HTTP Security.
- Course list is empty: API user lacks permission to view hidden categories or courses. Ensure metasteps_api has the system-level Manager role.
Important Note: Don't change Moodle's session timeout. Metasteps relies on the default ~2-hour timeout to keep students authenticated inside 3D spaces.
Appendix: What your Moodle admin sets up first
If you don't already have a Moodle URL and API token, here's a high-level summary of what your admin will do on their side. Send them the full Moodle Admin Setup Guide for click-by-click steps.
- Enable Web Services and the REST protocol: In Site administration → Advanced features, the admin enables Web Services. Then under Server → Web services → Manage protocols, they enable REST. SOAP can stay off, Metasteps only uses REST.
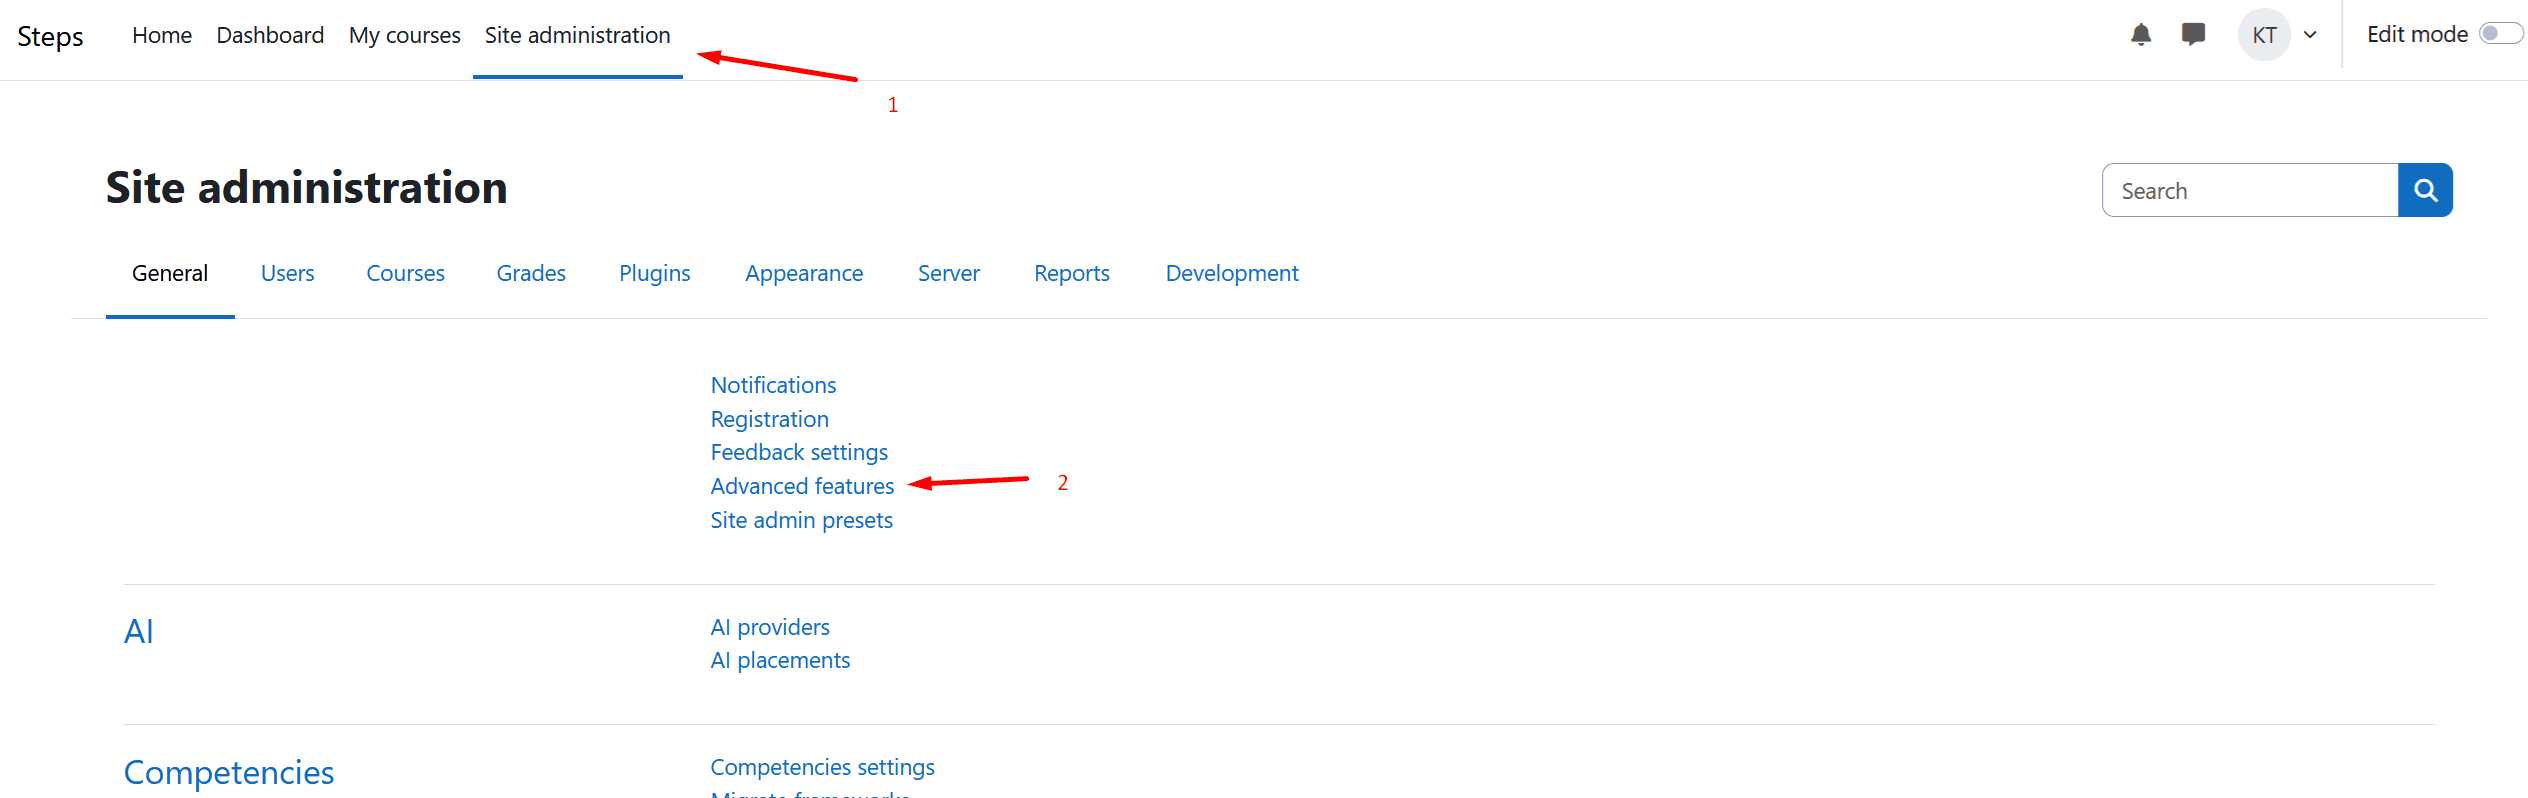
Site administration - Advanced features (Moodle)
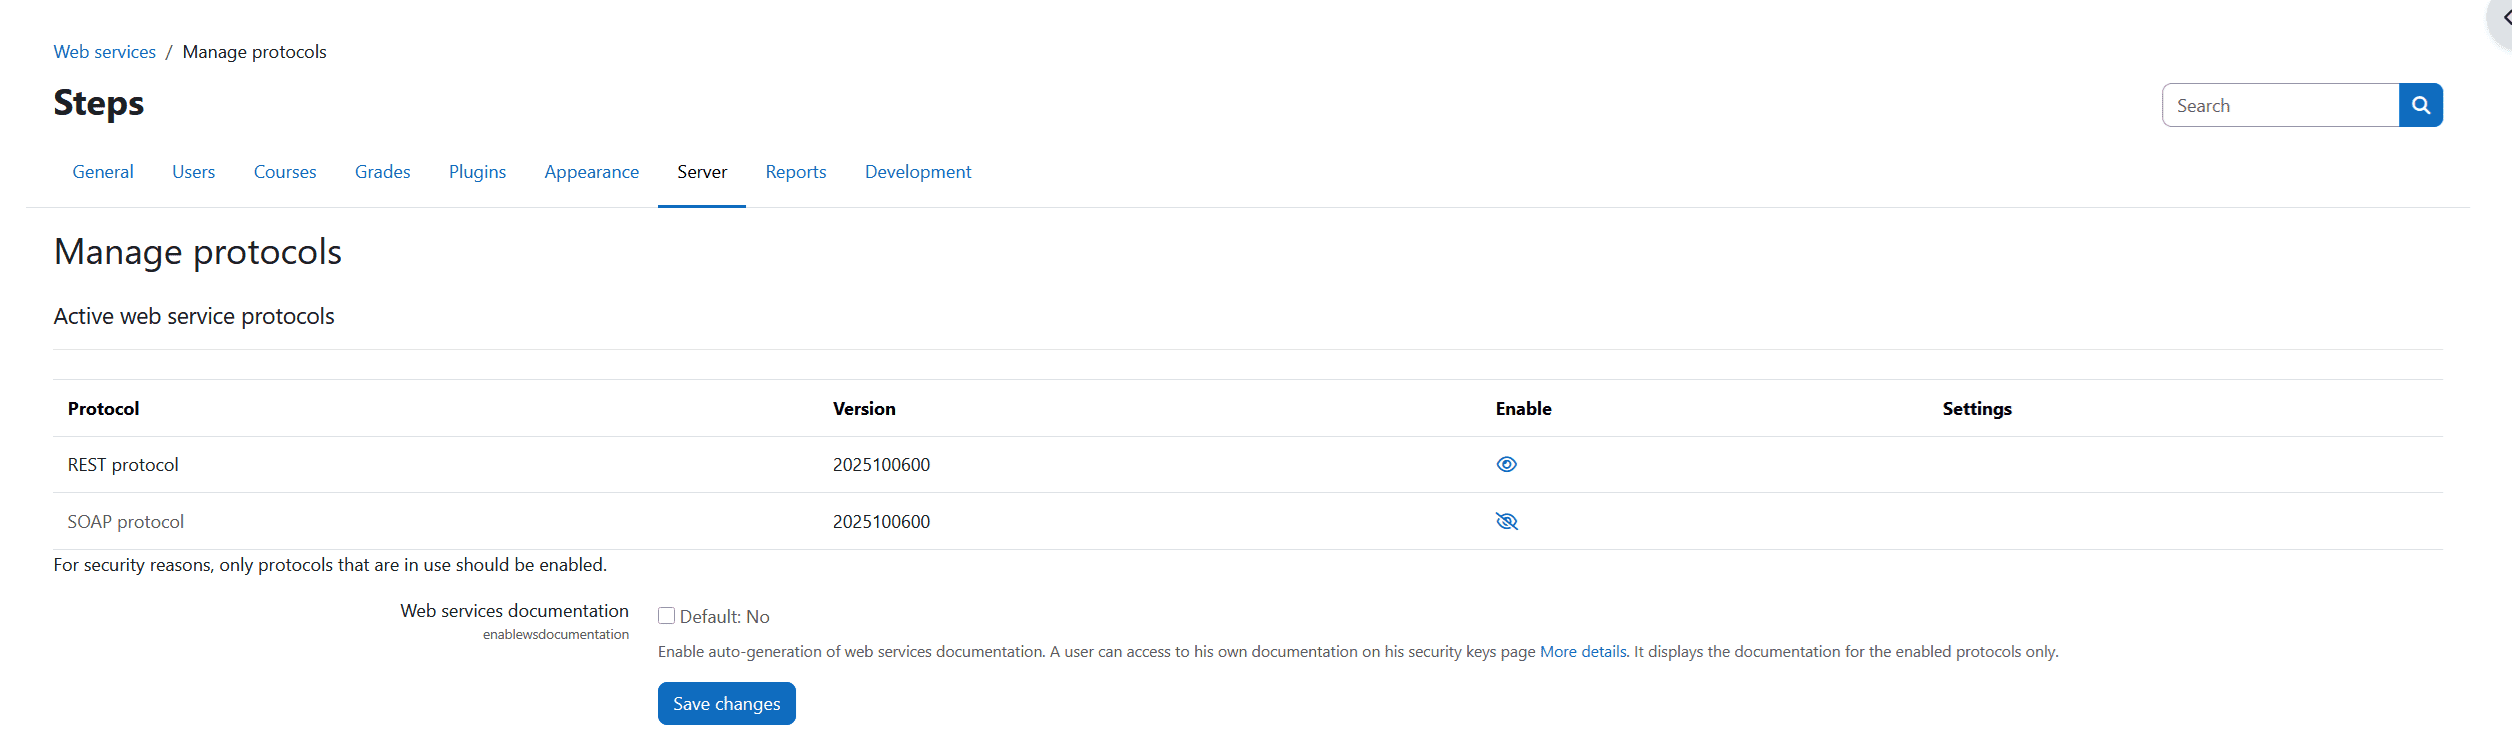
Manage protocols - REST enabled.
- Create a dedicated API user: Username metasteps_api on Manual accounts, with a strong password and a real email address. Force password change is unchecked.
- Grant the system-level Manager role: This gives the API user the capabilities to read hidden courses and categories.
- Create the "Metasteps Integration" service: A custom external service named "Metasteps Integration" (short name: metasteps), enabled, with Authorised users only ticked.
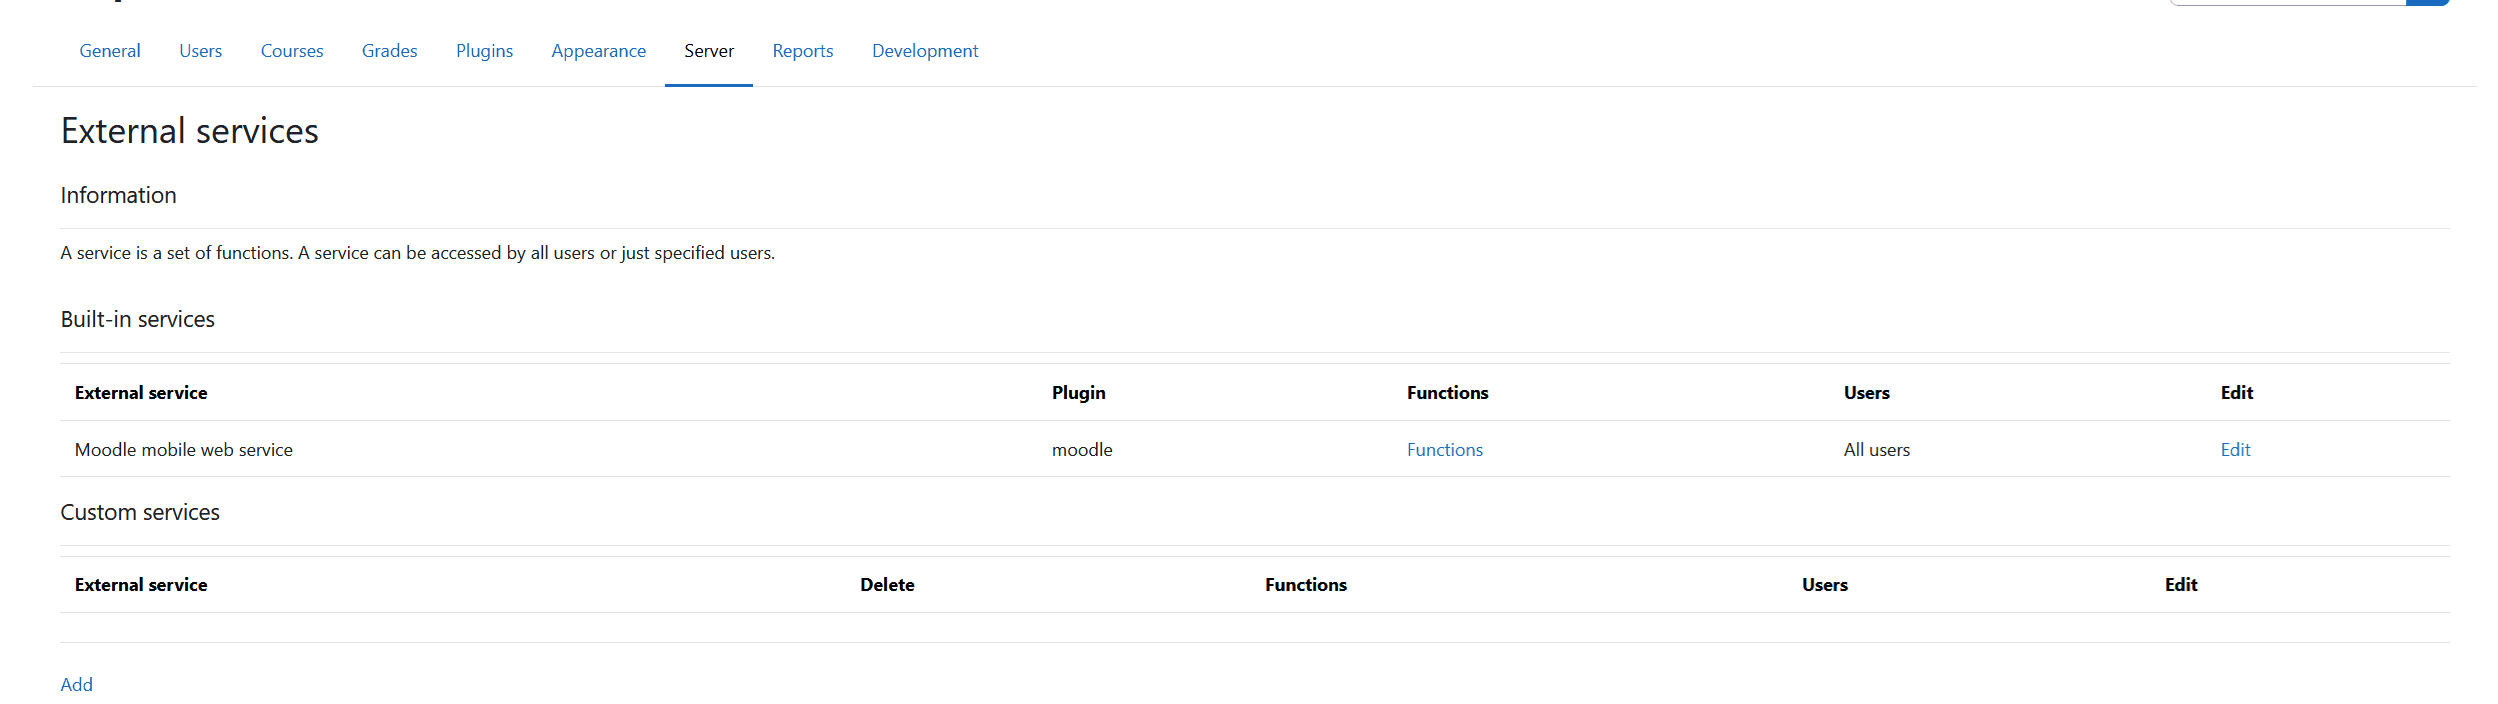
External services - Metasteps Integration.
- Add the required functions: core_webservice_get_site_info, core_course_get_courses_by_field, core_course_get_categories, core_course_get_contents, and optionally auth_userkey_request_login_url for SSO.
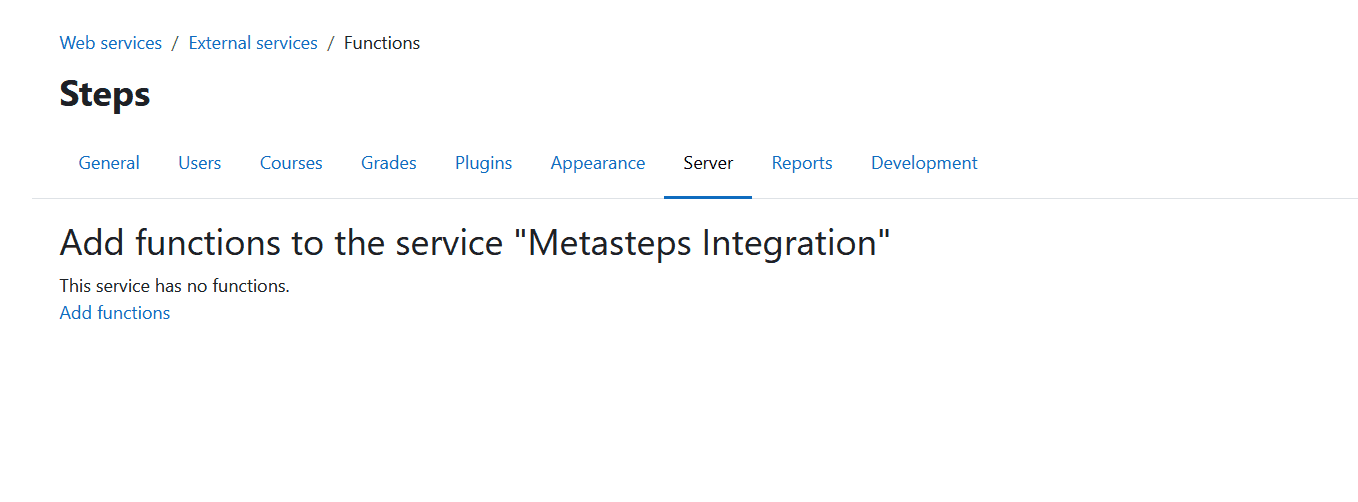
Adding functions to the Metasteps Integration service.
- Authorise the API user: Move metasteps_api from Not authorised users into Authorised users on the Metasteps Integration service. Any "Missing capabilities" warning is resolved by the Manager role.
- Generate the token: Create a token named metasteps-token for metasteps_api against the Metasteps Integration service, no IP restriction, no expiry. The token is shown once; copy it immediately.
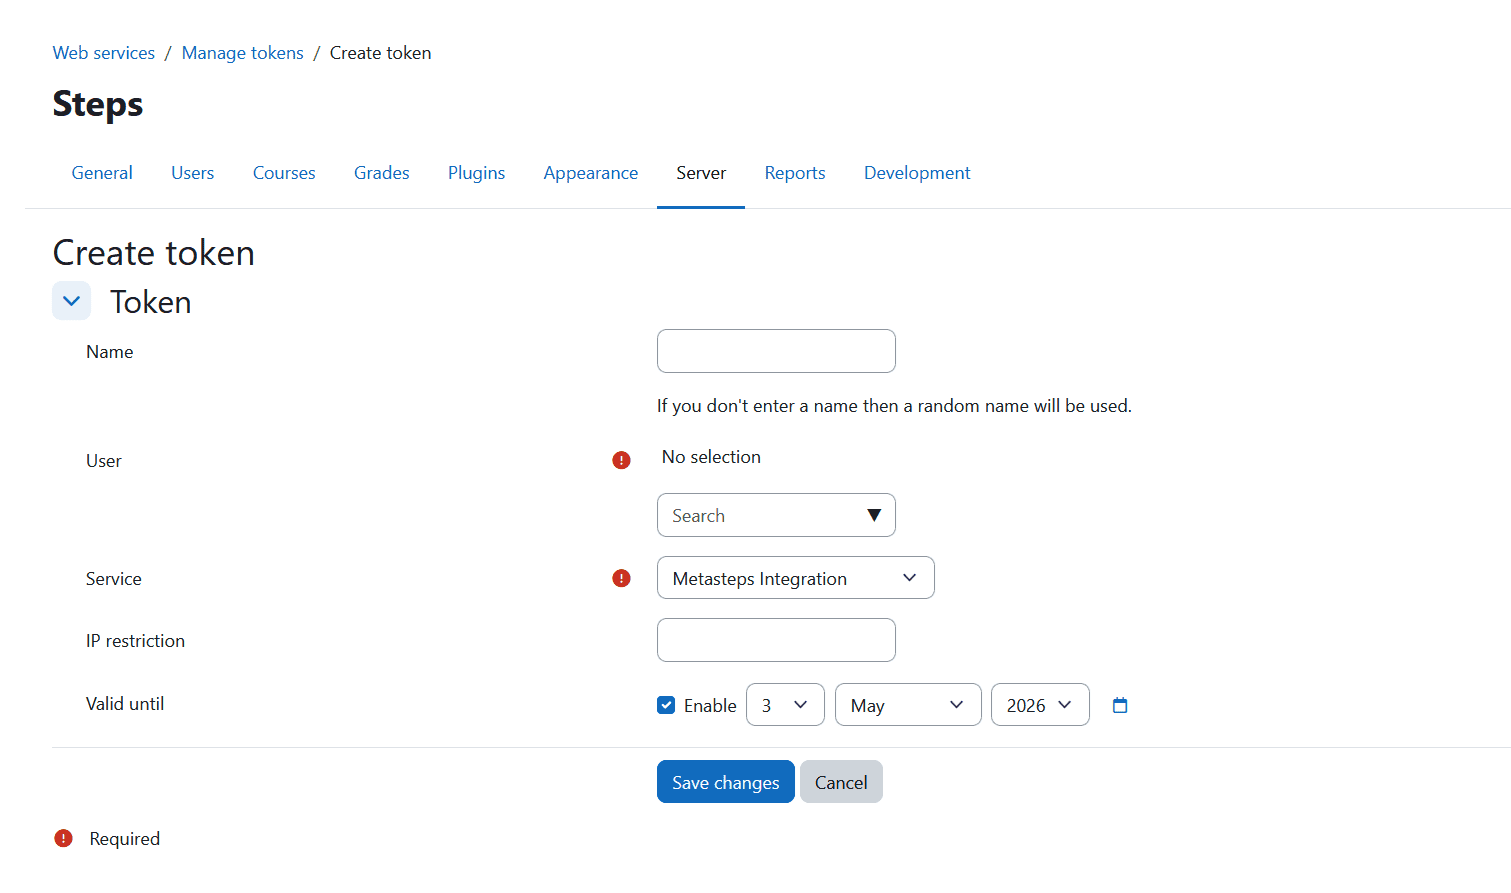
Create token form (Moodle).
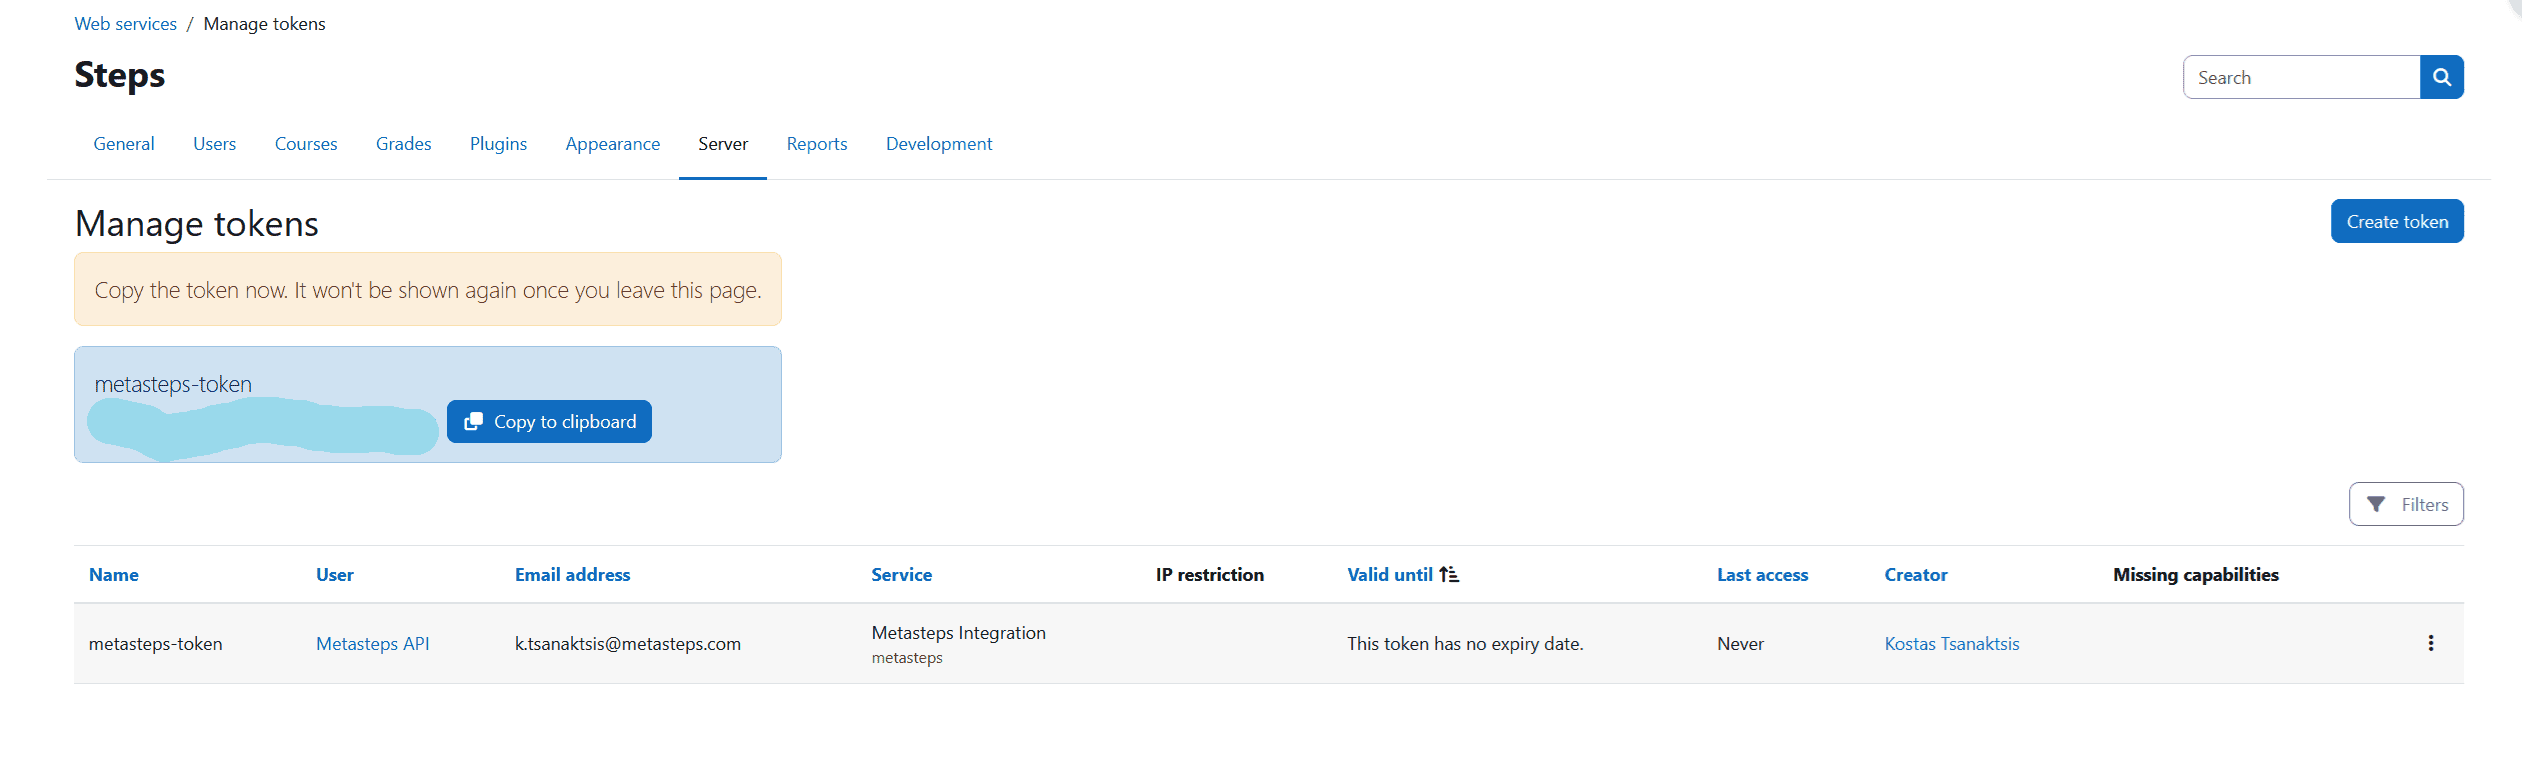
The new token in Manage tokens.
- Enable frame embedding: Under Site administration → Security → HTTP Security, tick Allow frame embedding.
- (Optional) Install auth_userkey for SSO: Install the plugin from moodle.org/plugins/auth_userkey, enable User key authentication with Mapping field set to Email address, and add auth_userkey_request_login_url to the Metasteps Integration service. Student emails in Metasteps and Moodle must match for SSO to work.
Ready to Move On?
Now that your Moodle is connected and the library is populated, your team can put that content to work. Send them Use Moodle content in your 3D space for the full member workflow, browsing the Moodle tab, dropping activities into 3D scenes, and what students will see when they enter.